
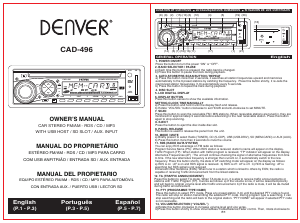
MP3 OPERATION
P.2 P.3
TRACK SEARCH
Press “AMS” button more than 2 seconds, “TRK SCH” will be shown on the display and “TRK 0” will
appear on the display for you to enter. Rotate the volume button to shift number 0-9 in loop. Then,
press it shortly for the first digit selected. Repeat the same procedure for the rest of the digits if
require. Once all digits are entered, press the volume button more than 2 seconds to start playing
the selected track.
increase setting level and vise versa.
c)Press this button more than 2 seconds, it activates the selection mode in cyclical position.
Remark : “MULT OFF/ MULT ON” and “BEEP ON/ BEEP OFF” are not available for this model.
15/16. MANUAL UP/DOWN TUNING / TRACK SEEK UP/DOWN
On radio mode, pressing this button more than 2 seconds, it will tune one frequency step higher or lower. On
CD/USB/SD mode, pressing this button shortly will move to the one track higher or lower. Pressing more than
2 seconds, it will move fast forward or backward to a specific position.
17. STATION PRESET BUTTON (1-6)
a)Each station preset can be store in FM1, FM2, FM3, MW1 and MW2. Press the button shortly recalls the
station frequency which was memorized.
b)It can be memorized the frequency stations manually on specific preset stations by holding the desired
specific preset station in 2 seconds.
c) Press the preset 2 to scan the first 10 seconds of all the tracks during CD/USB/SD mode.
d) Press the preset 4 to play the tracks in random order during CD/USB/SD mode.
e) Press the preset 5/6 to search -10/+10 track during USB/SD mode.
18. RESET
The reset button is located on the front of main panel. This reset circuitry is provided to protect the unit's
microprocessor. Whenever the reset button is activated, all preset memories content will be erased. It
should only be activated under the below conditions: a) Initial installation after all wires are completed.
b) Abnormal operation.
19. AUXILIARY INPUT
Press MODE button (10) until the “AUX” mode is shown on display. The unit is ready to play files from the
external audio device.
20. SD CARD SLOT
Press MODE button (10) until the “MEM-CARD” mode is shown on display. The unit is ready to play files
from the SD card.
21. USB HOST
Press MODE button (10) until the “USB-DRIV” mode is shown on display. The unit is ready to play files
from the USB device.
FILE SEARCH
Press “AMS” button more than 2 seconds and press one more, the “FILE SCH” will be shown on the
display. Press “AMS” button and rotate the volume button to find the desired directory. Press the
volume button to enter the desired directory. Rotate the volume button to select the file. Then, press
the volume button more than 2 seconds to start playing.
CHARACTER SEARCH
Press “AMS” button more than 2 seconds and press twice, the “CHAR SCH” will be shown on the
display for you to enter. Rotate the volume button to shift “A-Z”, “0-9” & * (space) in loop. Then, press
it shortly for the first character selected. Repeat the same procedure for the rest of the character if
require. Once the whole name is entered, press the volume button more than 2 seconds to start
playing.
Remark :
a) The media must contain files name in order to use in searching.
b) If only partial letters are entered for searching, you might not get it correctly.
c) If the above search can not be completed within 10 seconds, the unit will continue play back the
current file.
d) Do not attempt to play a media containing non-MP3 files. Otherwise, the radio may not work properly.
WIRE CONNECTION
ISO CONNECTOR
FROM CABLE SIDE
FOR 4 SPEAKERS
B
RIGHT REAR + RIGHT REAR
RIGHT FRONT + RIGHT FRONT
LEFT FRONT + LEFT FRONT
LEFT REAR + LEFT REAR
(GRAY) (GRAY/BLACK)
(PURPLE)
(PURPLE/BLACK)
(GREEN)
(GREEN/BLACK)
(WHITE) (WHITE/BLACK)
2
4
6
8
1
7
5
3
2
4
6
8
1
7
5
3
MEMORY
GROUND
IGNITION
(YELLOW)
(BLACK)
(RED)
POWER
ANTENNA
(BLUE)
POWER
FROM CABLE SIDE
A
ISO CONNECTOR
A
B
FUSE 10A
ANTENNA
RCA LINE OUT
INSTALLATION
METAL
MOUNTING
STRIP
DASHBOARD
MOUNTING
CASE
CONSOLE
HEXAGON
NUT
HEXAGON
BOLT
UNIT REMOVAL
1. Remove Front Panel and
Frame.
2. Insert the removal keys
into the slot and gently to
remove mounting case.
3. Keep removal keys in a
safe place for future
removal of unit.
REMOVAL KEYS
END OF LIFE DISPOSAL
Electric and electronic equipment contains materials, components and substances that can be hazardous to
your health and the environment, if the waste material (discarded electric and electronic equipment) is not
handled correctly. Electric and electronic equipment is marked with the crossed out trash can symbol, seen left.
This symbol signifies that electric and electronic equipment should not be disposed of with other household
waste, but should be disposed of separately. All cities have established collection points, where electric and
electronic equipment can either be submitted free of charge at recycling stations and other collection sites, or
be collected from the households. Additional information is available at the technical department of your city.
FUNCIONAMENTO EM GERAL
1. LIGAR/DESLIGAR
Premir o botão para “LIGAR” ou “DESLIGAR” a alimentação.
2. SELECTOR DE BANDA / PAUSA
a) De cada vez que premir este botão, a banda de rádio é alterada.
b) Premir este botão para parar a faixa durante a reprodução.
3. BOTÃO GRAVAÇÃO AUTOMÁTICA/PRÉ-BUSCA / REPETIR
a) Premir este botão mais do que 2 segundos, busca todas as frequências acima e memoriza
automaticamente até 6 estações pré-definidas pela captura da frequência. Premir este botão ligeiramente
rechama as frequências de estação memorizadas (1-6) automaticamente a cada 5 segundos.
b) Premir este botão para repetir a faixa durante a reprodução.
4. ENTRADA DISCO
5. VISOR DIGITAL LCD
6. BOTÃO VISOR
Premir este botão serve para mostrar informação disponível.
Português
8. EJECTAR
Premir o botão para ejectar o disco da entrada do disco.
9. SOLTAR O PAINEL
Este botão é usado para soltar o painel da unidade.
10. MODO / SILÊNCIO
a) Premir brevemente para seleccionar Rádio (SINTONIZADOR), CD (S-CDP), USB (UNID-USB), SD
(CARTÃO MEM) ou AUX (AUX).
b) Premir este botão mais do que 2 segundos para cortar o som.
11. RDS (RADIO DATA SYSTEM)
Pode aproveitar as vantagens RDS no rádio FM como se segue:
Nome do Programa de Serviço (PS): Quando a estação RDS é recebida, o nome da estação aparecerá no visor.
Programa de Tráfego (TP): Quando a estação com programa de tráfego é recebida, o indicador “TP” aparecerá
no visor.
Frequências Alternativas (AF): A unidade continuará a verificar o sinal de frequências alternativas de tempos a
tempos. Se a nova frequência alternativa for mais forte que a actual, mudará automaticamente para a nova
frequência. Premir este botão ligeiramente, o estado do modo de comutação AF aparecerá no visor, como se
segue:
a) RDS está ligado: AF está ligado e o sinal RDS é recebido.
b) RDS está desligado: AF está desligado.
c) RDS está a piscar: AF está a buscar mas o sinal RDS não é recebido.
Outras Redes Melhoradas (EON): Quando sintonizar uma estação que está ligada a outras por EON, o rádio
está capaz de receber Avisos de Tráfego das estações ligadas.
12. TA ( )AVISOS DE TRÁFEGO
Premir este botão para seleccionar o modo TA. Quando o modo TA está ligado, está apto a receber avisos
CONFIGURAR A HORA DO RELÓGIO MANUALMENTE
a) Premir o botão e manter premido até que o visor pisque e largar.
b) Rodar botão “VOL/SEL” no sentido horário para definir HORA e anti-horário para definir MINUTOS.
7. BUSCA
Premir este botão para buscar as estações FM / MW recepcionáveis. Quando as estações recepcionáveis
estão sintonizadas, são monitorizadas por 5 segundos aproximadamente antes de avançar para a próxima
recepcionável. Premir de novo o botão para parar a busca.
WARNING!!
Remove two small screws on the
top of the unit before operate the
unit. Otherwise, it may not work
properly.


Únase a la conversación sobre este producto
Aquí puedes compartir lo que piensas sobre Denver CAD-496 Radio para coche. Si tiene alguna pregunta, primero lea atentamente el manual. Puede solicitar un manual utilizando nuestro formulario de contacto.
responder | Ha sido de gran ayuda (0) (Traducido por Google)
responder | Ha sido de gran ayuda (0) (Traducido por Google)