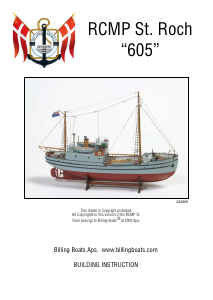
ST. ROCH
In 1940, the St. Roch set out from Vancouver on a secret mission through the Northwest passage. On this voyage, the St. Roch combined its
normal supply mission with a deliberate assertion of Canadian sovereignty over the Arctic. Due to heavy ice conditions, the ship spent two winters
frozen in Arctic waters, nally reaching Halifax on October 11, 1942. The voyage claimed the life of one crew member. The St. Roch was the rst
ship to complete the voyage through the Northwest Passage from Pacic to Atlantic. In the summer of 1944, it became the rst ship to traverse the
Arctic in both directions when it crossed the Northwest Passage again, this time from Halifax to Vancouver. The St. Roch was built in 1928 by the
Burrard Dry Dock Company in North Vancouver.
KEEL, FRAMES AND DECK
Place the building slip A on a rm foundation. Release the keel carefully. Sand or cut off any ridges left from the die-cut plate. Nail one of the keels
to the slip, placing the frames so that the upper edge is even with the deck position.
Before gluing on the decks, check to make sure that they t into the ridges. Start with the middle deck. Place the bulkheads nos. 14 and 15 at the
lower edge of the fore and aft decks. Before beginning the planking, sand all frames ush in order to ensure as large a gluing surface as possible.
Position the bulwarks nos. 18 and 19 along the upper edge of the frames.
PLANKING
Measure and adjust the length of the planking strips before gluing. Some of the strips should be tapered for and aft (resembling a half cigar),
so that they can be positioned naturally, without tension, on the hull. It is a good idea to make a mark on both frame no. 5, for example, and the
corresponding strip, making it easier to afc precisely. Begin the planking process with a strip which follows the lower edge of the bulwarks and runs
along the upper edge of frames nos. 3, 4 and 5. Spread glue (white cement) on the frames and the upper edge of the individual strip, and position
with pins. When the hull has been planked and polished, the two fender strips no. 21 can be mounted. Afx strip no. 22 to the bulwarks as shown.
CABINS, DECK STRUCTURES, ETC.
Cut out the cabin parts nos. 27, 28 and 29 and glue together. Glue the end pieces on the side pieces so that the end pieces t into the notches on
the railing. Glue on the roof. Plank the cabin with strip no. 22. Start by mounting the corner strips vertically, then ll out the space with horizontal
strips. Place strip no. 21 along the edge of the deck and plank the deck between with strip no. 22. Fore, under the overhang, glue on the angles no.
51; aft glue on the shed roof no. 5. Glue the rigging guards no. 39 to the deck. Sand the entire ship and paint light blue (no. 47). Mount a thin thread
as guideline from the rigging sockets over the 6 wheels to a nail on the aft deck under frame no. 68. Glue on the bridge bulwarks no. 40 to the deck
on the strip along the edge. Place strip no. 20 on top to form the rail. Stain and lacquer.
HOLD, WINCHES, SKYLIGHTS, ETC.
Assemble the companionway from the foredeck using block no. 61 as well as pieces nos. 62 and 63. Lacquer, and paint the blocks white and the
roof light blue. Afx the door no. 49. Assemble the foredeck skylight using block no. 64 and veneer pieces no. 65. Mount ttings no. F-317 in the
holes and paint all skylight parts white. Assemble the samll box on the main deck using blocks no. 55 and lid no. 56. Place strip no. 20 on the inside
edge as a hinge and paint the box white. Assemble the foredeck hold using block no. 54. Begin by placing strip no. 22 around th upper edge, then
mount the plastic lid. Paint the hold light blue. Assemble the stairway to the cabin using no. 52. Paint light blue with brown steps. Assemble the
cabin skylight using blocks no. 41 and 42. Glue ttings F-67 in the holes and paint the skylight using no. 133. Use pole no. 44 and top no. 45 for the
funnel and no. 43 for the base. Paint the funnel and base using no. 63; paint the top black. Mount the ttings as shown on the drawing. Paint the
pin-rail boards no. 60 and glue them under the rail forwards on the middle deck. Paint the pin-rail boards no. 77 and attach them to the rigging 20
mm above the rail. Assemble the foredeck platform on the starboard (right-hand) side using no. 72 and 4 pieces of F-663. Paint light blue.
LIFEBOATS, ANCHORS, DOORS, DAVITS, ETC.
Paint the insides of the lifeboats white and the outsides light blue. Paint the benches brown. Use no. 47 to construct the slip. Shape the davits using
F-409 brass wire and the valves at the foredeck and aft cabin using F-409 brass wire. Stain and lacquer the doors no. 36 and 48. Paint the anchors
black and position as shown. Paint the foredeck anchor light blue.

Únase a la conversación sobre este producto
Aquí puedes compartir lo que piensas sobre Billing Boats set BB605 Boatkits St. Roch. Si tiene alguna pregunta, primero lea atentamente el manual. Puede solicitar un manual utilizando nuestro formulario de contacto.
responder | Ha sido de gran ayuda (0) (Traducido por Google)
responder | Ha sido de gran ayuda (0) (Traducido por Google)