
Size: 19.685" x 17.5"
How to Use
This product is for household use only.
Caution: Do not leave oven unattended when in operation. Food ignition may
occur. If this happens, unplug unit but DO NOT open door. To reduce the risk
of fire, keep oven interior completely clean and free of food residues, oil,
grease and any other combustible materials.
Caution: A fire may occur if the toaster oven is covered or touching
flammable materials including curtains, draperies, walls and the like
when in operation or after, when still hot. Do not place any of the following
materials in the oven, on top of the oven, or in contact with the oven sides or
bottom surfaces: paper, cardboard, plastic or the like.
GETTING STARTED
• Remove all packing material and any stickers.
• Wash all removable parts as instructed in CARE AND CLEANING.
• Select a location where this unit is to be used, allowing enough space
from back of the unit and the wall to allow heat to flow without damage to
cabinets and walls.
• Plug unit into electrical outlet.
IMPORTANT INFORMATION ABOUT YOUR OVEN
• This oven gets hot. When in use, always use oven mitts or pot
holders when touching any outer or inner surface of the oven.
• During first few minutes of use you may notice smoke and a
slight odor. This is normal and should cause no concern.
• You must set the timer or select Stay On for the oven to function.
TOAST FUNCTION
It is not necessary to preheat the oven for toasting.
1. Set temperature selector knob to TOAST position.
2. Open oven door.
3. Insert slide rack.
4. Place desired pieces of bread or bagel to be toasted directly on slide rack
and close the door.
5. Turn toast shade selector knob to 10 and then turn back to desired toast
shade.
Note: You must set the toast shade selector knob as desired for the oven to
begin toasting.
6. For best results, on first toasting cycle set the toast selector knob to
medium which will be midway between light and dark setting, then
re-adjust for next cycle to lighter or darker to suit your preference.
7. The on indicator light comes on and remains on until toasting cycle is
complete.
8. When toast cycle is complete, there will be an audible signal. The oven and
the on indicator light will go off.
9. Open the oven door. Using oven mitts or pot holders, slide the rack out to
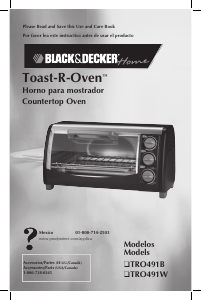
TOASTER OVEN
HORNO TOSTADOR
Customer Care Line:
USA 1-800-231-9786
Accessories/Parts (USA)
1-800-738-0245
For online customer service
and to register your product, go to
www.prodprotect.com/applica
Servicio para el cliente:
México 01-800 714-2503
Accesorios/Partes (EE.UU)
1-800-738-0245
Para servicio al cliente y para
registrar su garantía, visite
www.prodprotect.com/applica
Please Read and Save this Use and Care Book.
IMPORTANT SAFETY
INSTRUCTIONS
When using electrical appliances, basic safety precautions should
always be followed including the following:
❍ Read all instructions.
❍ Do not touch hot surfaces. Use handles or knobs.
❍ To protect against electrical shock do not immerse cord, plugs
or appliance in water or other liquid.
❍ Close supervision is necessary when any appliance is used by
or near children.
❍ Unplug from outlet when not in use and before cleaning. Allow
to cool before putting on or taking off parts.
❍ Do not operate any appliance with a damaged cord or plug, or
after the appliance malfunctions or has been damaged in any
manner. Return appliance to the nearest authorized service
facility for examination, repair or adjustment.
❍ The use of accessory attachments not recommended by the
appliance manufacturer may cause injuries.
❍ Do not use outdoors.
❍ Do not let cord hang over edge of table or counter, or touch
hot surfaces.
❍
Do not place on or near a hot gas or electric burner, or in a
heated oven.
❍
Extreme caution must be used when moving an appliance
containing hot oil or other hot liquids.
❍ To disconnect, turn any control to Off, then remove plug from
wall outlet.
❍
Do not use appliance for other than intended use.
❍ Use extreme caution when removing tray or disposing of hot
grease.
❍
Do not clean with metal scouring pads. Pieces can break off
the pad and touch electrical parts, creating a risk of electric
shock.
❍
Oversized foods or metal utensils must not be inserted in
a toaster oven, as they may create a fire or risk of electric
shock.
❍
A fire may occur if the toaster oven is covered or touching
flammable material including curtains, draperies, walls and
the like, when in operation.
❍ To switch off the appliance turn Toast/Timer knob to "Off"
position.
❍ This appliance is not intended for use by persons (including
children) with reduced physical, sensory or mental
capabilities, or lack of experience and knowledge, unless they
have been given supervision or instruction concerning use of
the appliance by a person responsible for their safety.
❍ Children should be supervised to ensure that they do not play
with the appliance.
❍ Extreme caution must be exercised when using containers
constructed of other than metal or glass.
❍ Do not store any materials, other than the manufacturer’s
recommended accessories, in this oven when not in use.
❍ Do not place any of the following materials in the oven: paper,
cardboard, plastic and the like.
❍ Do not cover crumb tray or any part of the oven with metal foil.
This will cause overheating of the oven.
SAVE THESE INSTRUCTIONS.
This product is for household use only.
GROUNDED PLUG
As a safety feature, this product is equipped with a grounded plug,
which will only fit into a three-prong outlet. Do not attempt to defeat
this safety feature. Improper connection of the grounding conductor
may result in the risk of electric shock. Consult a qualified electrician
if you are in doubt as to whether the outlet is properly grounded.
TAMPER-RESISTANT SCREW
Warning: this appliance is equipped with a tamper-resistant screw
to prevent removal of the outer cover. To reduce the risk of fire or
electric shock, do not attempt to remove the outer cover. There are
no user-serviceable parts inside. Repair should be done only by
authorized service personnel.
ELECTRICAL CORD
a) A short power-supply cord (or detachable power-supply cord) is to
be provided to reduce the risk resulting from becoming entangled in
or tripping over a longer cord.
b) Longer detachable power-supply cords or extension cords are
available and may be used if care is exercised in their use.
c) If a long detachable power-supply cord or extension cord is used,
1) The marked electrical rating of the detachable power-supply
cord or extension cord should be at least as great as the
electrical rating of the appliance,
2) If the appliance is of the grounded type, the extension cord
should be a grounding-type 3-wire cord, and
3) The longer cord should be arranged so that it will not drape over
the countertop or tabletop where it can be pulled on by children
or tripped over.
Note: If the power supply cord is damaged, it should be replaced by
qualified personnel.
Product may vary slightly from what is illustrated.
remove the toast.
10. Unplug appliance when not in use.
BAKE FUNCTION
Note: For best results, when baking or cooking, always preheat the oven for at
least 10 minutes at the desired temperature setting.
1. Set temperature control dial to the desired setting from 150 ˚F to 400 ˚F.
2. Turn time selector knob to 10 and then turn back or forward to desired
baking time, including preheat time. (Select "Stay On" to bake longer than 30
minutes or to control cooking time yourself. Be sure to use a kitchen timer.)
3. The indicator light comes on and will remain lit during the entire baking
time.
4. The heating elements will cycle on and off to maintain even heat
distribution.
5. Once oven has preheated, open oven door and insert food. Close oven door.
Note: You can cook your food two ways:
• In the bake pan/drip tray placed on the slide rack, or
• Directly on the slide rack with the bake pan/drip tray inserted on the rack
support rails underneath the slide rack to catch drippings.
Note: Be sure food does not extend past the outer limits of the bake pan to
prevent grease dripping onto the heating elements.
• Use a metal, glass or ceramic baking dish placed on the slide rack. Be
sure food or baking dish does not come within 1½ inches of the top heating
elements.
6. The first time you use the oven, follow the manufacturer's or recipe
directions and check for doneness at minimum suggested cooking time. If
using the oven timer, there will be an audible signal once the baking cycle
is complete. The oven turns off and the light goes out.
7. If not using the oven timer, turn the oven to Off once cooking cycle is
complete.
8. Open the oven door. Using oven mitts or pot holders, slide the rack out to
remove the cooked food.
9. Unplug appliance when not in use.
BROIL FUNCTION
Note: When broiling, preheat oven for 10 minutes.
1. Turn the temperature selector to Broil.
2. Open oven door and using the bake pan as a drip tray, insert it under the
slide rack on the rack support rails.
3. Set the timer to desired number of minutes including preheat time or to
Stay On if you want to control cooking time or need to cook your food longer
than 30 minutes.
4. Place food on the baking pan slide rack/broiling rack.
Note: Be sure the top edge of the food or container is at least 1½” (3.81 cm)
away from the upper heating elements.
Important: Food should not extend beyond the edges of the bake pan/drip
tray to avoid drippings from falling onto the heating elements.
5. Cook food according to recipe or package instructions and check at
minimum time to see if it is done.
6. When finished broiling, the signal bell sounds. Turn the TOAST/TIMER
selector to the Off position. The power indicator light goes off.
7. Using an oven mitt or pot holder, slide out broiling rack together with bake
pan to remove food.
8. Unplug appliance when not in use.
BROILING CHART
Cooking times are approximate and should be adjusted to individual
NEED HELP?
For service, repair or any questions
regarding your appliance, call the
appropriate 800 number on cover of this
book. Please DO NOT return the product
to the place of purchase. Also, please DO
NOT mail product back to manufacturer,
nor bring it to a service center. You may
also want to consult the website listed on
the cover of this manual.
Two-Year Limited Warranty
(Applies only in the United States and
Canada)
What does it cover?
• Any defect in material or workmanship
provided; however, Spectrum Brands
Inc.'s liability will not exceed the
purchase price of product.
For how long?
• Two years from the date of original
purchase with proof of such purchase.
What will we do to help you?
• Provide you with a reasonably similar
replacement product that is either new
or factory refurbished.
How do you get service?
• Save your receipt as proof of date of
sale.
• Visit the online service website at
www.prodprotect.com/applica, or call
toll-free 1-800-231-9786, for general
warranty service.
• If you need parts or accessories, please
call 1-800-738-0245.
What does your warranty not cover?
• Damage from commercial use
• Damage from misuse, abuse or neglect
• Products that have been modified in any
way
• Products used or serviced outside the
country of purchase
• Glass parts and other accessory items
that are packed with the unit
• Shipping and handling costs associated
with the replacement of the unit
• Consequential or incidental damages
(Please note, however, that some states
do not allow the exclusion or limitation
of consequential or incidental damages,
so this limitation may not apply to you.)
How does state law relate to this
warranty?
• This warranty gives you specific legal
rights. You may also have other rights
that vary from state to state or province
to province.
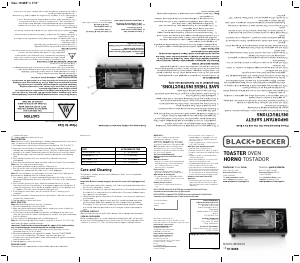
1. Power on indicator light
† 2. Temperature selector knob
(Part # TO1200-01)
† 3. TOAST/TIMER selector knob with
stay on setting (Part # TO1200-02)
4. swing-down crumb tray (under unit)
† 5. Slide rack (Part # TO1200-03)
6. Rack support rails
† 7 . Bake pan/drip tray
(Part # TO1200-04)
Note: † indicates consumer replaceable/
removable parts
Código de fecha / Date Code
Sello del Distribuidor:
Fecha de compra:
Modelo:
© 2015 Spectrum Brands, Inc.
Made and Printed in People’s Republic of China
Fabricado e Impreso en la República Popular de China
Importado por / Imported by:
RAYOVAC ARGENTINA S.R.L.
Humboldt 2495 Piso# 3
(C1425FUG) C.A.B.A. Argentina.
C.U.I.T No. 30-70706168-1
Importado por / Imported by:
Rayovac de México SA de C.V
Autopista México Querétaro
No 3069-C Oficina 004
Colonia San Andrés Atenco, Tlalnepantla
Estado de México, C.P. 54040
Mexico.
Tel: (55) 5831-7070
Para atención de garantía marque:
01 (800) 714 2503
Comercializado por:
Rayovac de México SA de C.V
Autopista México Querétaro
No 3069-C Oficina 004
Colonia San Andrés Atenco,
Tlalnepantla
Estado de México, C.P. 54040
Mexico.
Tel: (52) 5831-7070
Servicio y Reparación
Art. 123 No. 95
Col. Centro, C.P. 06050
Deleg. Cuauhtemoc
Servicio al Consumidor,
Venta de Refacciones y Accesorios
01 800 714 2503
12025-00
preferences.
CAUTION
THIS OVEN GETS HOT.
WHEN IN USE, ALWAYS USE OVEN
MITTS OR POT HOLDERS WHEN
TOUCHING ANY OUTER OR INNER
SURFACE OF THE OVEN.
FOOD APPROXIMATE TIME
Chicken pieces (1-4) 30 - 40 minutes
Hamburgers (1-3) 8 – 22 minutes
Beef steaks (1-2) 18 – 25 minutes
Fish steaks (1-6) 10 – 18 minutes
Care and Cleaning
This product contains no user serviceable parts. Refer service to qualified
service personnel.
CLEANING
Important: Before cleaning any part, be sure the oven is off, unplugged, and
cool.
1. Clean the glass door with a sponge, soft cloth or nylon pad and sudsy water.
Do not use a spray glass cleaner.
2. To remove the slide rack, open the door, pull the rack forward and out. Wash
the slide rack in sudsy water or in a dishwasher. To remove stubborn spots,
use a polyester or nylon pad.
3. Wash the bake pan in sudsy water. To minimize scratching, use a polyester
or nylon pad.
4. To open crumb tray, tip back oven, push the crumb tray knob away from
you then down. Wipe with a dampened cloth or paper toweling and dry
thoroughly. To close, pull the crumb tray knob forward, swing the crumb
tray closed, and then pull knob in to lock into place before operating the
oven.
EXTERIOR SURFACES
Wipe the top and exterior walls with a damp cloth or sponge. dry thoroughly.
COOKING CONTAINERS
Metal, ovenproof glass or ceramic bakeware without glass lids can be used
in your oven. Follow manufacturer’s instructions. Be sure the top edge of the
container is at least 1½” (3.81 cm) away from the upper heating elements.
g
BLACK+DECKER and the BLACK+DECKER logo are trademarks of The Black & Decker
Corporation and are used under license. All rights reserved.
BLACK+DECKER y el logo tipo BLACK+DECKER son marcas registradas de The Black&Decker
Corporation y son utilizados bajo licencia. Todos los derechos reservados.
Important:
When using the TIMER/TOAST function, always
turn the knob past 10 and then turn back or
forward to desired setting.
To switch off the appliance turn TOAST/TIMER
knob to "Off" position.
MODEL/MODELO
❍
TO1200B




Únase a la conversación sobre este producto
Aquí puedes compartir lo que piensas sobre Black and Decker TO1200B Horno. Si tiene alguna pregunta, primero lea atentamente el manual. Puede solicitar un manual utilizando nuestro formulario de contacto.