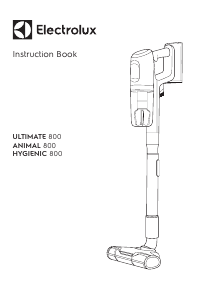
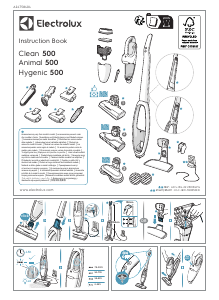
Manual de uso Electrolux PD91-8SSM Aspirador
¿Necesita un manual para su Electrolux PD91-8SSM Aspirador? A continuación puedes ver y descargar el manual en PDF gratis en español. Este producto actualmente tiene 10 preguntas frecuentes, 0 comentarios y tiene 0 votos. Si este no es el manual que desea, , contáctenos.
¿Su producto tiene algún defecto y el manual no ofrece ninguna solución? Vaya a Repair Café para solicitar un servicio de reparación gratuito.
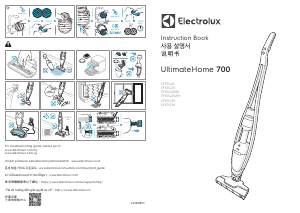
Manual de uso
Loading…


Loading…
Puntuación
Dé su opinión de la Electrolux PD91-8SSM Aspirador calificando el producto. ¿Quiere compartir su experiencia con este producto o hacer una pregunta? Deje un comentario en la parte inferior de la página.Más sobre este manual
Entendemos que es bueno tener un manual en papel para tus Electrolux PD91-8SSM Aspirador. Siempre puedes descargar el manual desde nuestro sitio web e imprimirlo tú mismo. Si deseas tener un manual original te recomendamos contactar con Electrolux. Es posible que puedan proporcionar un manual original. ¿Estás buscando el manual de tu Electrolux PD91-8SSM Aspirador en otro idioma? Elija su idioma preferido en nuestra página de inicio y busque el número de modelo para ver si lo tenemos disponible.
Especificaciones
| Marca | Electrolux |
| Modelo | PD91-8SSM |
| Categoría | Aspiradores |
| Tipo de archivo | |
| Tamaño del archivo | 6.04 MB |
Todos los manuales para Electrolux Aspiradores
Más manuales de Aspiradores
Preguntas frecuentes sobre Electrolux PD91-8SSM Aspirador
Nuestro equipo de atención al cliente busca información útil sobre los productos y responde a las preguntas frecuentes. Si encuentra inexactitudes en las preguntas frecuentes, indíquenoslo usando nuestro formulario de contacto.
El tubo de la aspiradora está obstruido, ¿qué puedo hacer? Verificado
Quite el tubo y mire dentro para ver si está realmente obstruido. Si este es el caso, coja un objeto largo, como un palo de escoba y empuje cuidadosamente a través del tubo. Esto, por lo general, eliminará cualquier objeto que esté obstruyendo el tubo. Si esto no le ayudó, debe ponerse en contacto con el fabricante.
Ha sido de gran ayuda (1464) Leer más¿Cuáles son las medidas de las bolsas para aspiradoras? Verificado
Hay dos medidas para tener en cuenta. La primera es la medida de la placa con la entrada a la bolsa. Esto determina si la bolsa se ajustará a una determinada aspiradora. Luego está la medida de la propia bolsa. Se suele indicar en litros y determina cuánto polvo puede contener la bolsa.
Ha sido de gran ayuda (941) Leer másQuiero saber la antigüedad de mi electrodoméstico Electrolux. ¿Cómo puedo averiguarla? Verificado
Puede determinar la antigüedad de su producto a través del número de serie. Lo encontrará en su dispositivo. El primer dígito del número de serie indica el año (p. ej., 1 = 2001) y los dos caracteres siguientes indican la semana de producción (p. ej., 35 = semana 35 de aquel año). Así que, el número de serie 13500016 indica que el aparato se ha fabricado en la semana 35 del año 2001.
Ha sido de gran ayuda (835) Leer másEl cable de alimentación de mi aspiradora no se rebobina en el aparato. ¿Qué puedo hacer? Verificado
Es posible que haya un nudo en el cordón o que esté doblado. Desenrolle completamente el cable algunas veces y vuelva a rebobinarlo en el dispositivo mientras lo guía con sus manos. Si esto no resuelve el problema, es posible que el mecanismo para rebobinar el cable esté roto. Si es así, contacte con el fabricante o con un servicio de reparación.
Ha sido de gran ayuda (657) Leer másMi aspiradora emite un silbido. ¿Qué puedo hacer? Verificado
Este problema a menudo se debe a una bolsa de polvo llena o filtro obstruido. También ocurre cuando hay una abertura que permite la entrada de aire en la manguera. Revise la bolsa de la aspiradora y el filtro y cámbielos si es necesario. Revise la manguera para ver si hay algún agujero o mala conexión. Si esto no resuelve el problema, póngase en contacto con el fabricante.
Ha sido de gran ayuda (551) Leer más¿Cómo elimino el polvo y el pelo del cabezal de cepillado de la aspiradora? Verificado
Debe eliminar el polvo y el pelo del cabezal de cepillado de la aspiradora a mano. Si esto no da el resultado deseado, puede usar un peine fino para quitar la suciedad restante.
Ha sido de gran ayuda (536) Leer más¿Qué ajuste debo usar en el cabezal de cepillado de la aspiradora? Verificado
Casi todas las aspiradoras tienen un cabezal con cepillo ajustable. Use el cepillo para superficies duras a fin de evitar rasguños y daños. Retire el cepillo para las alfombras y los tapetes.
Ha sido de gran ayuda (419) Leer más¿Puedo usar una bolsa de papel para aspiradora más de una vez? Verificado
No lo aconsejamos. Los poros de la bolsa se saturarán, provocando una pérdida de succión y posibles daños al motor.
Ha sido de gran ayuda (286) Leer más¿Qué es HEPA? Verificado
HEPA son las siglas de High-Efficiency Particulate Air. Muchas aspiradoras tienen un filtro HEPA. Un filtro HEPA detendrá al menos el 85% y como máximo el 99,999995% de todas las partículas de 0,3 micrómetros (µm) y más.
Ha sido de gran ayuda (259) Leer más¿Puedo usar una aspiradora normal para aspirar las cenizas? Verificado
No, esto es absolutamente imposible. La ceniza que parece fría todavía puede estar tibia o incluso caliente por dentro. Una aspiradora normal no está diseñada para esto y puede provocar un incendio. Además, los filtros de las aspiradoras normales no siempre son adecuados para retener partículas extremadamente pequeñas como las cenizas. Entonces puede alcanzar el motor de la aspiradora y causar daños.
Ha sido de gran ayuda (251) Leer más


Únase a la conversación sobre este producto
Aquí puedes compartir lo que piensas sobre Electrolux PD91-8SSM Aspirador. Si tiene alguna pregunta, primero lea atentamente el manual. Puede solicitar un manual utilizando nuestro formulario de contacto.