
(5)(5)
(5)(5)
(5)
2. With the power off, connect your input cables to the CHANNEL 1 and 2
inputs using the 1/4" (1, 2,) or XLR (3, 4) INPUT JACKS of each channel.
3. Connect the loudspeakers to the CHANNEL 1 and CHANNEL 2
SPEAKER OUTPUTS (10, 12, or 13, 14). THE TOTAL SPEAKER LOAD
MUST BE AT LEAST 4 OHMS PER CHANNEL. If you try to operate at a
lower impedance, the amplifier will go into protection mode and stop
operation until you correct the load conditions.
4.
With the LEVEL CONTROLS (20. 21) of both channels set to zero (fully
counterclockwise), turn the POWER SWITCH (15) ON. With the level
controls of your MIXER or other INPUT device turned all the way DOWN,
turn the amplifier level controls all the way up for desired loudness from
your speakers.
Note, when the CLIP LED (19) light, there is distortion
present in the amplifier’s output section. If a CLIP LED (19) remains on or
flashes repeatedly, reduce the signal level by lowering the input level
control for the channel that is clipping or reduce the level at the source.
5. Now adjust your MIXER or other INPUT source to your desired listening
level. You also have the choice of keeping the volume of both speakers
equal, or for certain situations you can adjust the volume so one side
will be louder than the other.
PARALLEL MONO OPERATION:
Follow these instructions for PARALLEL MONO operation using a
single input cable, and you will have the same monophonic signal on
both the CHANNEL 1 and the CHANNEL 2 outputs. Each channel’s
output is controlled independently by that channel’s level control.
1. With the power OFF, set the OPERATION MODE SWITCH (5) to the
PARALLEL MONO position.
2. With the power OFF, connect your input cables to the CHANNEL 1 input
only using the INPUT JACK, 1/4" (1) or XLR (3) of CHANNEL 1.
3. Connect the loudspeakers to the CHANNEL 1 and CHANNEL 2
SPEAKER OUTPUTS (10, 12). THE TOTAL SPEAKER LOAD MUST BE
AT LEAST 4 OHMS PER CHANNEL. If you try to operate at less than 4
Ohms per channel, the amplifier will go into the protection mode and stop
operation until you correct the load conditions.
4. With the LEVEL CONTROLS (20. 21) of both channels set to zero (fully
counterclockwise), turn the POWER SWITCH (15) ON. With the level
controls of your MIXER or other INPUT device turned all the way DOWN,
turn the amplifier level controls all the way up for desired loudness from
your speakers. Note, when the CLIP LED (19) light, there is distortion
present in the amplifier’s output section. If a CLIP LED (19) remains on or
flashes repeatedly, reduce the signal level by lowering the input level
control for the channel that is clipping or reduce the level at the source.
5. Now adjust your MIXER or other INPUT source to your desired listening
level. You also have the choice of keeping the volume of both speakers
equal, or for certain situations you can adjust the volume so one side
will be louder than the other.
MONO BRIDGE OPERATION:
Follow these instructions to bridge the unit’s output. Bridging the
amplifier converts the unit to a monophonic or single channel amplifier.
The amplifier can be used with 8 Ohm or higher loads only in MONO
BRIDGE mode. This mode is used to provide a higher voltage with
greater headroom to your speaker. Before setting your amplifier for
MONO BRIDGE operation, make sure that your speaker can handle the
high power level provided by the amplifier in MONO BRIDGE mode.
CAUTION: VOLTAGE OVER 100 VOLTS MAY BE PRODUCED AT THE BRIDGE OUTPUT
TERMINALS IN THIS MODE.
1. With the power off, set the OPERATION MODE SWITCH (5) to the
BRIDGE position.
2. With the power off, connect your input cables to CHANNEL 1 input only
using the INPUT JACK, 1/4" (1) or XLR (3) of CHANNEL 1.
3. Connect the loudspeaker to the BRIDGE SPEAKER OUTPUT (11) only.
Be sure the polarity of your connection is correct. The total speaker load
must be at least 8 Ohms or above. If you try to operate at less than 8
Ohms in the MONO BRIDGE mode, the amplifier will go into the
protection mode and stop operation until you correct the load conditions.
4. With the CHANNEL 1 LEVEL CONTROL (20) set to zero (fully
counterclockwise), turn the POWER SWITCH (15) ON. With the level
controls of your MIXER or other INPUT device turned all the way DOWN,
turn the amplifier level control all the way up for desired loudness from
your speakers. Note, when the CLIP LED (19) light, there is distortion
present in the amplifier’s output section. If a CLIP LED (19) remains on or
flashes repeatedly, reduce the signal level by lowering the input level
control for the channel that is clipping or reduce the level at the source.
5. Now adjust your MIXER or other INPUT source to your desired listening
level. You also have the choice of keeping the volume of both speakers
equal, or for certain situations you can adjust the volume so one side
will be louder than the other.
USING THE GROUND LIFT SWITCH:
Depending on your system configuration, sometimes applying the
ground will create a quieter signal path. Sometimes lifting the ground
can eliminate ground loops and hum to create a quieter signal path.
1. With the power amp on, listen to the system in idle mode (no signal present)
with the ground applied (the GROUND LIFT SWITCH (6) in the left position).
2. Turn the power off before moving the GROUND LIFT SWITCH (6). Lift the
ground by moving the GROUND LIFT SWITCH (6) to the right, turn the power
back on and listen to determine which position will provide a signal free of
background noise and hum. Keep the GROUND LIFT SWITCH (6) in the
ground position if the noise level remains the same in either position.
CAUTION: DO NOT TERMINATE THE AC GROUND ON THE POWER AMPLIFIER IN ANY WAY.
TERMINATION OF THE AC GROUND CAN BE HAZARDOUS.
SPECIFICATIONS:
X-01 X-02 X-03 X-04
Output Power EIA:.................................................1kHz @ 1% THD, Wrms
Both Channels Driven 8Ω 85 140 200 200
Both Channels Driven 4Ω 110 200 300 300
Mono Bridge 8Ω 220 400 600 600
Dynamic Headroom, dB:
At8Ω 1.4 1.5 1.6 1.6
At4Ω 1.9 2.0 2.2 2.2
Frequency Response..........................................................30 Hz - 50 kHz
Total Harmonic Distortion.............Iess than 0.05%, typical 0.02% @ 1 kHz
Signal to Noise ratio.............................100 dB below rated power @ 8Ω
Damping factor.......................................................greater than 200 @ 8Ω
Slew rate........................................................................................20 V/µS
Voltage gain, dB 28 30 32 32
Input Sensitivity (for rated power at 8Ω)........................................1 Vrms
Input Impedance Unbalanced............................................................10 kW
Input Impedance Balanced................................................................20 kW
Power consumption, W 500 800 1200 1200
(at rated power at 4Ω, both channels driven)
AC Power Requirements..........110-120 V / 60 Hz and 220-240 V / 50 Hz
Indicators:...............................................................................1 Power LED
...............................................................................................1 Protect LED
........................................1 Signal LED per Channel (for X-01, X-02, X-03)
..............................................................1VU-meter per Channel (for X-04)
Cooling........................................................ Fan, Front-to-Rear Forced Air
Protection:.............................................Short Circuit, DC, Thermal Cut-off,
...............................................................Sub/Ultrasonic Frequency Filters,
.......................................Turn-on Delay, Main Fuse, Secondary DC Fuses
Connectors:
Balanced/Unbalanced lnputs.............................................1/4" Jacks, XLR
Speaker Outputs.....................................3-Way Binding Posts, 1/4" Jacks
Dimensions:
X-01, X-02, X-03.................19"W x 10.75"D x 3.5"H (483 x 273 x 89 mm)
X-04.................................19"W x 10.75"D x 5.25"H (483 x 273 x 133 mm)
Weight 16.3 Ibs 17.8 Ibs 20.2 Ibs 21.6 Ibs
7.4 kg 8.1 kg 9.2 kg 9.8 kg
SPECIFICATIONS AND DESIGN ARE SUBJECT TO CHANGE
WITHOUT NOTICE FOR PURPOSE OF IMPROVEMENT.
IN THE USA: IF YOU EXPERIENCE PROBLEMS WITH THIS UNIT, PLEASE CALL 1 (732) 738-9003 FOR
GEMINI CUSTOMER SERVICE. DO NOT ATTEMPT TO RETURN THIS EQUIPMENT TO YOUR DEALER.






Únase a la conversación sobre este producto
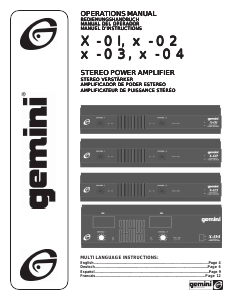
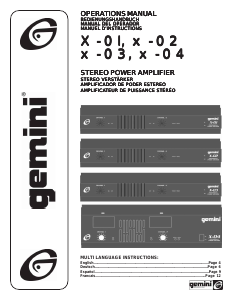
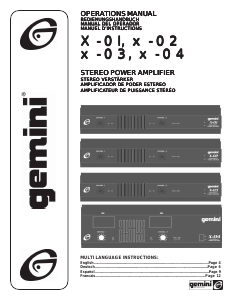
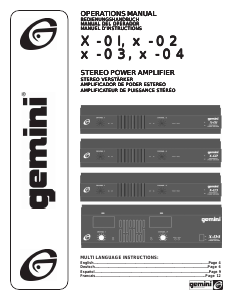
Aquí puedes compartir lo que piensas sobre Gemini X-04 Amplificador. Si tiene alguna pregunta, primero lea atentamente el manual. Puede solicitar un manual utilizando nuestro formulario de contacto.