Manual de uso Joovy Scooter X2 Cochecito

¿Necesita un manual para su Joovy Scooter X2 Cochecito? A continuación puedes ver y descargar el manual en PDF gratis en español. Este producto actualmente tiene 5 preguntas frecuentes, 0 comentarios y tiene 0 votos. Si este no es el manual que desea, , contáctenos.

¿Su producto tiene algún defecto y el manual no ofrece ninguna solución? Vaya a Repair Café para solicitar un servicio de reparación gratuito.

Manual de uso

Loading…

EN
FR ES
2 Unfolding the Stroller
Keep children away from stroller while unfolding.
Orient the stroller with the handlebar facing upward and closest to you.
If necessary, release the folding lock located on the right side by lifting the lock off of the extended rivet. See Figure 2.1.
Pull upwards on the handlebar until the stroller is completely opened and the latching mechanism on each side is engaged. See Figure
2.2.Becarefulnottoscratchtheoorwhenopeningthestroller.
Visually check and gently push downward on the handlebar to ensure that the stroller is completely opened and locked before ANY use of
the product.
CAUTION:Whileunfoldingthestroller,becarefultokeepyourngersfrombeingpinchedbymovingparts.
!
WARNING
ALWAYS keep children away from the stroller when unfolding.
Possible pinching hazard – Be careful when unfolding the stroller.
3 Installing the Rear Wheel Axle and Brake Set and Rear Wheels
In a clean, dry place rest the stroller upside down with the rear legs facing upwards.
Locate the rear axle and brake set and slide it onto the rear legs with the link brake facing the rear of the stroller. Be sure to slide each
side all the way on until the push pins are engaged in the holes of the plastic.
NOTE: You may need to push each of the push pins in to slide the plastic into place. See Figure 3.1.
Pull upward on each side of the rear axle to ensure it is installed properly.
Push the bar linking the brake levers into the disengaged position. See Figure 3.2.
To Install a Rear Wheel
Locate a small washer and slide the washer onto the axle.
Next place a rear wheel onto the axle over the small washer.
NOTE: The brake teeth on the wheel should be facing inward toward the brake lever.
Then place one large washer onto the axle over the wheel.
Next slide a spring washer onto the axle.
Take another large washer and slide it onto the axle.
Push the washers in to expose the axle hole. Then take one snap pin and insert the straight leg into the
smallholeintheaxle.Pushitrmlyintothisholeuntiltheroundportionoftheotherlegsnapscompletely
around the outside of the axle.
NOTE: The snap pin is curved (concave) to make insertion easier.
Repeat the SAME installation sequence of washers, wheel, and snap pin for the remaining wheel.
Install a hubcap onto each wheel by aligning the 5 tabs on the hubcap with the 5 slots in the wheel, and
then pushing it into place. Ensure that ALL 5 snaps have engaged securely and the hubcap cannot be
pulled off.
4 Rear Wheel Brakes
The ScooterX2 comes equipped with a linked rear wheel brake system.
To engage the rear wheel brakes, push down on one of the brake levers or the bar that connects the levers. See Figure 4.1. The stroller
may require slight forward or rearward movement in order to line up the teeth on the brake with each wheel brake cluster.
Check that the brakes are properly applied by attempting to push the stroller backwards and forwards.
To release the brakes, gently lift up on one of the brake levers or the bar that connects the levers. See Figure 4.2.
!
WARNING
Always make sure the wheel brakes are engaged when the stroller is not being pushed so that the stroller will not roll
away. Never leave stroller unattended, especially on a hill or incline, as the stroller may tip over or slide.
5 Installing the Front Wheels
Position the stroller so it is resting on the rear wheels and the handlebar. Locate one front wheel set and position the wheel set with the
swivel lock tab facing upward. Insert it onto a post located at the bottom front on one side of the stroller until an audible click is heard. See
Figure 5.1.
Pull outward on the wheel set to ensure the wheel set is installed properly.
Repeat this procedure for the other wheel.
To remove a front wheel set, pull the metal ring at the bottom of the front wheel housing and slide the wheel set off of the post. See Figure
5.2.
Small Washer
Rear Wheel
Large Washer
Spring Washer
Snap Pin
1
2
3
4
5
6
Large Washer
REAR WHEEL SEQUENCE
Descargue el manual en Español (PDF, 0.65 MB)
(Piense en el medioambiente y solo imprima este manual si es de verdad necesario)

Loading…

Puntuación

Dé su opinión de la Joovy Scooter X2 Cochecito calificando el producto. ¿Quiere compartir su experiencia con este producto o hacer una pregunta? Deje un comentario en la parte inferior de la página.
¿Estás satisfecho con elJoovy Scooter X2 Cochecito?
No
Sea el primero en calificar este producto
0 votos

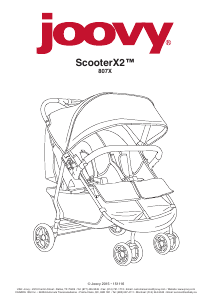
Únase a la conversación sobre este producto

Aquí puedes compartir lo que piensas sobre Joovy Scooter X2 Cochecito. Si tiene alguna pregunta, primero lea atentamente el manual. Puede solicitar un manual utilizando nuestro formulario de contacto.

Más sobre este manual

Entendemos que es bueno tener un manual en papel para tus Joovy Scooter X2 Cochecito. Siempre puedes descargar el manual desde nuestro sitio web e imprimirlo tú mismo. Si deseas tener un manual original te recomendamos contactar con Joovy. Es posible que puedan proporcionar un manual original. ¿Estás buscando el manual de tu Joovy Scooter X2 Cochecito en otro idioma? Elija su idioma preferido en nuestra página de inicio y busque el número de modelo para ver si lo tenemos disponible.

Especificaciones

Marca Joovy
Modelo Scooter X2
Categoría Cochecitos
Tipo de archivo PDF
Tamaño del archivo 0.65 MB

Todos los manuales para Joovy Cochecitos
Más manuales de Cochecitos

Preguntas frecuentes sobre Joovy Scooter X2 Cochecito

Nuestro equipo de atención al cliente busca información útil sobre los productos y responde a las preguntas frecuentes. Si encuentra inexactitudes en las preguntas frecuentes, indíquenoslo usando nuestro formulario de contacto.

¿Cuáles son los pros y los contras de los neumáticos de aire en un cochecito? Verificado

La mayor ventaja de los neumáticos de aire en un cochecito es que son muy cómodos tanto para el niño como para la persona que lo empuja. Los neumáticos de aire proporcionan una amortiguación en superficies irregulares como bosques o la playa. La desventaja es que los neumáticos de aire pueden desinflarse.

Ha sido de gran ayuda (231) Leer más

¿Cuáles son los pros y los contras de usar neumáticos de espuma en un cochecito? Verificado

La mayor ventaja de los neumáticos de espuma en un cochecito es que no pueden pincharse. Los neumáticos de espuma ofrecen una amortiguación algo menor que los de aire, pero son más cómodos que los macizos. Muchos cochecitos modernos utilizan una combinación de neumáticos macizos en la parte delantera y otros de espuma en la parte trasera, lo que hace que sean ágiles y cómodos.

Ha sido de gran ayuda (141) Leer más

¿Cuáles son los pros y los contras de usar neumáticos macizos en un cochecito? Verificado

Los neumáticos macizos hacen que el cochecito sea muy ágil. La desventaja es que los neumáticos macizos proporcionan menos amortiguación y, por lo tanto, son menos cómodos que aquellos de aire o de espuma.

Ha sido de gran ayuda (136) Leer más

¿Qué cochecito es mejor para un bebé recién nacido? Verificado

Para un bebé recién nacido lo más importante es que pueda estar tumbado. Esto ayuda a la capacidad de respirar y al desarrollo de los pulmones.

Ha sido de gran ayuda (27) Leer más

¿Hasta qué edad se utiliza cochecito? Verificado

En general un cochecito se utiliza hasta los 36 meses (3 años).

Ha sido de gran ayuda (21) Leer más
Manual de uso Joovy Scooter X2 Cochecito

Productos relacionados

Categorias relacionadas