Manual de uso Kichler 15361AZT Six Lámpara

¿Necesita un manual para su Kichler 15361AZT Six Lámpara? A continuación puedes ver y descargar el manual en PDF gratis en español. Este producto actualmente tiene 7 preguntas frecuentes, 0 comentarios y tiene 0 votos. Si este no es el manual que desea, , contáctenos.

¿Su producto tiene algún defecto y el manual no ofrece ninguna solución? Vaya a Repair Café para solicitar un servicio de reparación gratuito.

Manual de uso

Loading…

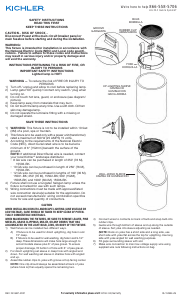
SAFETY INSTRUCTIONS
READ THIS FIRST
KEEP THESE INSTRUCTIONS
This xture is intended for installation in accordance with the National
Electric Code (NEC) and Local code specications. Failure to adhere to
these codes and instructions may result in serious injury and/or property
damage and will void the warranty.
1) WARNING: This xture is not to be installed within 10 feet (3M) of a pool,
spa or fountain.
2) This xture is to be used only with a power unit (transformer) rated a
maximum of 300 W (25 AMPS) 15 volts.
3) The #18 ga. xture wire is not intended for direct burial.
4) Direct burial rated wire is to be buried a minimum of 6” (152mm) beneath
the surface of the ground.
NOTE: If additional Direct Burial wire is needed, contact your local Kichler
®
landscape distributor.
8 GA wire can be purchased in length of 250’ (76 M), 15503-BK.
10 GA wire can be purchased in length of 250’ (76 M), 15504-BK.
12 GA wire can be purchased in lengths of 100’ (30 M), 15501-BK; 250’
(76 M), 15502-BK; 500’ (152M), 15505-BK; and 1000’ (304 M), 15506-BK.
5) Fixture shall not use a tungsten halogen lamp unless the xture is marked
for use with such lamps.
6) Wiring connections must be made with approved/listed wire connection
device(s) suitable for the application. Do not exceed manufacturers’ wiring
combination specications for size and quantity of conductors.
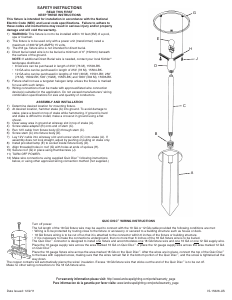
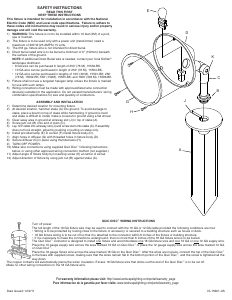
ASSEMBLY AND INSTALLATION
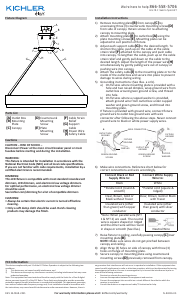
1) Determine desired location for mounting xture.
2) At desired location, hammer stake (A) into ground. To avoid damage to
stake, place a board on top of stake while hammering. If ground is hard
and stake is difcult to install, make a crosscut in ground using a at shovel.
3) Clear away area in ground at wireway slot (J) in top of stake (A).
4) Screw jam nut (B) onto end of stem (C).
5) Lay 12V cable into wireway slot (J) and screw stem into stake (A). If assembly
does not look straight, adjust by pushing or pulling on stake only.
6) Install provided lamp (E) to socket (F) inside xture body (D).
7) Align holes in diffuser (G) with threaded holes in xture body (D).
8) Secure diffuser (G) in place using thumbscrews (H).
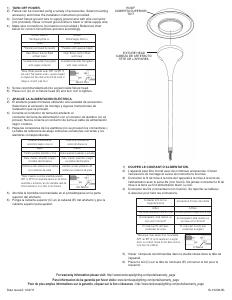
9) TURN OFF POWER.
10) Make wire connections using supplied Quic Disc
following instructions
below, or using other approved wiring connection method (not supplied.)
11) Adjust angle of xture body by loosening screw (K) at center of swivel.
12) Adjust direction of xture by using jam nut (B) against stake (A).
For warranty information please visit: http://www.landscapelighting.com/portal/warranty_page
Para informacion de la garantia por favor visite: www.landscapelighting.com/portal/warranty_page
Date Issued: 12/2/11 IS-15361-US
A
C
K
H
D
E
QUIC DISC
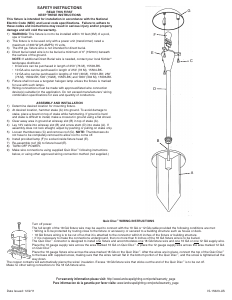
WIRING INSTRUCTIONS
Turn off power.
The full length of the 18 GA xture wire may be used to connect with the 10 GA or 12 GA cable provided the following conditions are met:
Wiring is to be protected by routing close to the xture or accessory or secured to a building structure such as house or deck.
18 GA xture wiring is to be cut off so that it is attached to the connector within 6 inches of the xture or building structure.
If it is necessary to make the connections underground, then no more than 6 inches of the 18 GA xture wire is to be buried.
The Quic Disc
connector is designed to install one xture and accommodates one 18 GA xture wire and one 10 GA or one 12 GA supply wire.
Place the 10 gauge supply wire across the area marked 10 GA on Quic Disc
or place the 12 gauge supply wire across the area marked 12 GA
on Quic Disc
.
Place the 18 gauge xture wire across the area marked 18 GA on the Quic Disc
. After the wires are in place, connect the top of the Quic Disc
to the base with supplied screw, making sure that the wires remain at in the bottom portion of the Quic Disc
, and the screw is tightened all the
way down.
The copper contacts will automatically pierce the wires’ insulation. Excess 18 GA xture wire that sticks out the end of the Quic Disc
is to be cut off.
Make no other wiring connections to the 18 GA xture wire.
B
J
G
Descargue el manual en Español (PDF, 0.23 MB)
(Piense en el medioambiente y solo imprima este manual si es de verdad necesario)

Loading…

Puntuación

Dé su opinión de la Kichler 15361AZT Six Lámpara calificando el producto. ¿Quiere compartir su experiencia con este producto o hacer una pregunta? Deje un comentario en la parte inferior de la página.
¿Estás satisfecho con elKichler 15361AZT Six Lámpara?
No
Sea el primero en calificar este producto
0 votos

Únase a la conversación sobre este producto

Aquí puedes compartir lo que piensas sobre Kichler 15361AZT Six Lámpara. Si tiene alguna pregunta, primero lea atentamente el manual. Puede solicitar un manual utilizando nuestro formulario de contacto.

Más sobre este manual

Entendemos que es bueno tener un manual en papel para tus Kichler 15361AZT Six Lámpara. Siempre puedes descargar el manual desde nuestro sitio web e imprimirlo tú mismo. Si deseas tener un manual original te recomendamos contactar con Kichler. Es posible que puedan proporcionar un manual original. ¿Estás buscando el manual de tu Kichler 15361AZT Six Lámpara en otro idioma? Elija su idioma preferido en nuestra página de inicio y busque el número de modelo para ver si lo tenemos disponible.

Especificaciones

Marca Kichler
Modelo 15361AZT Six
Categoría Lámparas
Tipo de archivo PDF
Tamaño del archivo 0.23 MB

Todos los manuales para Kichler Lámparas
Más manuales de Lámparas

Preguntas frecuentes sobre Kichler 15361AZT Six Lámpara

Nuestro equipo de atención al cliente busca información útil sobre los productos y responde a las preguntas frecuentes. Si encuentra inexactitudes en las preguntas frecuentes, indíquenoslo usando nuestro formulario de contacto.

¿Es regulable toda la iluminación led? Verificado

No, no todas las bombillas led son regulables. Esto se indica en el embalaje o en la propia bombilla.

Ha sido de gran ayuda (508) Leer más

Puse una nueva luz en mi lámpara pero no se enciende, ¿por qué? Verificado

Algunas lámparas están hechas para fuentes de luz de un vataje específico. Cuando se inserta una fuente de luz que requiere una potencia superior a la que puede proporcionar la lámpara, es posible que la luz no se encienda. Si la lámpara entrega un vataje mucho más alto de lo que está hecha la fuente de luz, la fuente de luz puede quemarse.

Ha sido de gran ayuda (371) Leer más

¿Por qué es importante el color de la luz? Verificado

Ha sido de gran ayuda (297) Leer más

¿Qué significa lumen? Verificado

Lumen es una unidad de medida para la cantidad total de luz visible emitida por una fuente.

Ha sido de gran ayuda (236) Leer más

¿Cuáles son las bases de tornillo que existen? Verificado

Hay muchos tipos de bases de tornillo en el mundo, pero la mayor parte está basada en la rosca Edison, indicada por la letra E. En la mayor parte de los países las bases de tornillo E27 y E14 son las más comunes. En los Estados Unidos las E26, E17, E12 y E10 son estándar.

Ha sido de gran ayuda (180) Leer más

¿Qué dicen los vatios acerca de mi lámpara? Verificado

El vatio es una unidad de medida para el consumo de electricidad. Las lámparas que emiten más luz suelen consumir más vatios, pero para comparar la potencia luminosa siempre debe usar los lúmenes.

Ha sido de gran ayuda (155) Leer más

¿Qué significa led? Verificado

Led significa diodo emisor de luz. Al guiar la electricidad en la dirección correcta a través de un semiconductor, se emite la luz.

Ha sido de gran ayuda (139) Leer más
Manual de uso Kichler 15361AZT Six Lámpara

Productos relacionados

Categorias relacionadas