Manual de uso Kichler 16024CBR30 VLO Lámpara

¿Necesita un manual para su Kichler 16024CBR30 VLO Lámpara? A continuación puedes ver y descargar el manual en PDF gratis en español. Este producto actualmente tiene 7 preguntas frecuentes, 0 comentarios y tiene 0 votos. Si este no es el manual que desea, , contáctenos.

¿Su producto tiene algún defecto y el manual no ofrece ninguna solución? Vaya a Repair Café para solicitar un servicio de reparación gratuito.

Manual de uso

Loading…

For warranty information please visit: kichler.com/customer-care/warranty-information/landscape-warranty
IS-16023-US
We’re here to help 866-558-5706
Hrs: M-F 9am to 5pm EST
IMPORTANT! PLEASE READ
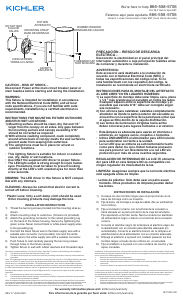
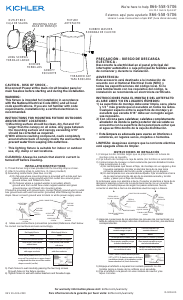
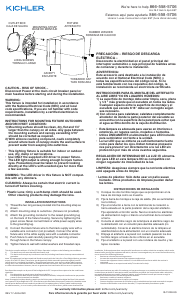
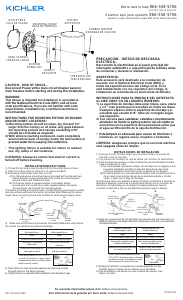
CAUTION – RISK OF SHOCK –
Disconnect Power at the main circuit breaker panel or main fusebox
before starting and during the installation.
This xture is intended for installation in accordance with the National
Electric Code (NEC) and Local code specications. Failure to adhere to
these codes and instructions may result in serious injury and/or property
damage and will void the warranty. If you are not familiar with code
requirements, installation by a certied electrician is recommended.
SAFETY INSTRUCTIONS
READ THIS FIRST
KEEP THESE INSTRUCTIONS
1) WARNING: This xture is not to be installed within 10 feet (3M) of
a pool, spa or fountain.
2) According to the requirements of the National Electric Code
(NEC), direct burial rated wire is to be buried a minimum of 6”
[152mm] beneath the surface of the ground.
NOTE: If additional Direct Burial wire is needed, contact your local
Kichler
®
landscape distributor.
8 GA wire can be purchased in length of 250’ (76 M),15503-BK.
10 GA wire can be purchased in length of 250’ (76 M),
15504-BK.
12 GA wire can be purchased in lengths of 100’ (30 M),
15501-BK; 250 (76 M), 15502-BK; 500’ (152M), 15505-BK;
and 1000’ (304 M), 15506-BK.
3) Wiring connections must be made with approved/listed wire connection
device(s) suitable for the application. Do not exceed manufacturers’
wiring combination specications for size and quantity of conductors.
CAUTION
WHEN INSTALLING KICHLER LANDSCAPE LIGHTING (LINE VOLTAGE
OR LOW VOLTAGE), CARE SHOULD BE TAKEN TO KEEP CLEAR OF
POTENTIALLY COMBUSTIBLE MATERIALS.
WHEN MAINTAINING THE FIXTURES, BE SURE TO REMOVE LEAVES,
PINE NEEDLES, GRASS CLIPPINGS, MULCH, OR ANY DEBRIS THAT
HAS ACCUMULATED ON THE LIGHT BULB, LENS, OR BODY OF THE
FIXTURE.
INSTALLATION
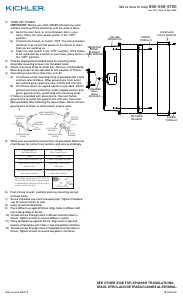
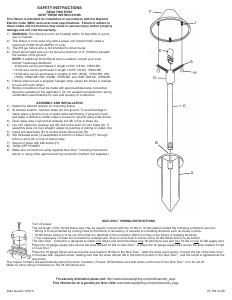
1) Determine desired location for xture and dig hole. Hole should be
approximately 6” (152mm) in diameter and 10” (254mm) deep.
2) Fill bottom of hole with approximately 3” (76mm) of pea gravel.
3) Lay xture in hole and backll around the xture with soil.
4) Make wire connection to main low voltage supply wire using supplied
twist-on wire connectors following instructions on bag.
BEAM ANGLE ADJUSTMENT
NOTE: Lighting xture comes from the factory with the light module aimed
vertically (straight upward). If beam adjustment is required, follow the
following steps:
Turn o󰀨 lighting xture before preparing to make beam adjustments.
NOTE: Necessary adjustments need to be made when dark.
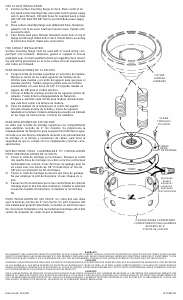
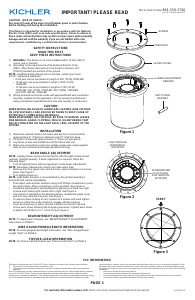
Remove trim ring, glass cover and 8 screws, place hardware in a secure
place. See Figure 1.
Turn lighting xture on.
NOTE: Light beam direction is accomplished by the gimbal assembly’s
horizontal and vertical adjustability.
First adjust vertical beam direction using a #2 Phillips screwdriver to pivot
the light module. Place screwdriver in hole provided. See Figure 2.
Horizontal adjustment is accomplished by placing your hand over light
module and rotating light module left or right. See Figure 2.
Once beam is adjusted to the desired position, reassemble glass cover
and trim ring using the 8 screws. See Figure 1.
To ensure proper sealing of unit, replace all 8 screws and hand tighten
screws to where the screw begins to engage with the housing.
Once all screws are in place, use the numbers on the trim ring and
torque each screw following the torqueing sequence. Tighten each screw
in pattern 20-25 LB-in (2.3 – 2.8 N-m) See Figure 3.
BEAM INTENSITY ADJUSTMENT
NOTE: To adjust beam intensity, see “BEAM INTENSITY ADJUSTMENT”
instructions on PAGE 2.
WIRE GAUGE/POWER/LENGTH INFORMATION
NOTE: For wire gauge/power/length information, see “Wire Gauge/Power/
Length Chart” on PAGE 2.
FIXTURE LOAD INFORMATION
NOTE: For xture load information,see “Fixture Load Chart” on PAGE 2.
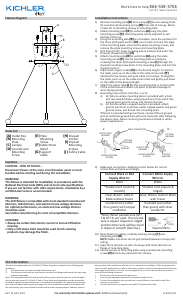
SCREW
TRIM RING
Figure 1
SWITCHING
MAGNET
GLASS COVER
1
8
4
6
2
7
3
5
Figure 2
Figure 3
START
LUMEN ADJUSTMENT
SENSOR
SCREWDRIVER
PIVOT HOLE
FOR VERTICAL
ROTATION
LIGHT MODULE
HORIZONTAL
ROTATION
PAGE 1
This device complies with part 15 of the FCC Rules. Operation is subject to the following two conditions:
1) This device may not cause harmful interference, and
2) This device must accept any interference received, including interference that may cause undesired
operation.
Note: This equipment has been tested and found to comply with the limits for a Class B digital device, pursuant
to part 15 of the FCC Rules. These limits are designed to provide reasonable protection against harmful
interference in a residential installation. This equipment generates, uses and can radiate radio frequency energy
and, if not installed and used in accordance with the instructions, may cause harmful interference to radio
communications. However, there is no guarantee that interference will not occur in a particular installation. If this
equipment does cause harmful interference to radio or television reception, which can be determined by turning
the equipment o󰀨 and on, the user is encouraged to try to correct the interference by one or more of the following
measures:
Reorient or relocate the receiving antenna.
Increase the separation between the equipment and receiver.
Connect the equipment into an outlet on a circuit di󰀨erent from that to which the receiver is connected.
Consult the dealer or an experienced radio/TV technician for help.
FCC INFORMATION
Descargue el manual en Español (PDF, 2.47 MB)
(Piense en el medioambiente y solo imprima este manual si es de verdad necesario)

Loading…

Puntuación

Dé su opinión de la Kichler 16024CBR30 VLO Lámpara calificando el producto. ¿Quiere compartir su experiencia con este producto o hacer una pregunta? Deje un comentario en la parte inferior de la página.
¿Estás satisfecho con elKichler 16024CBR30 VLO Lámpara?
No
Sea el primero en calificar este producto
0 votos

Únase a la conversación sobre este producto

Aquí puedes compartir lo que piensas sobre Kichler 16024CBR30 VLO Lámpara. Si tiene alguna pregunta, primero lea atentamente el manual. Puede solicitar un manual utilizando nuestro formulario de contacto.

Más sobre este manual

Entendemos que es bueno tener un manual en papel para tus Kichler 16024CBR30 VLO Lámpara. Siempre puedes descargar el manual desde nuestro sitio web e imprimirlo tú mismo. Si deseas tener un manual original te recomendamos contactar con Kichler. Es posible que puedan proporcionar un manual original. ¿Estás buscando el manual de tu Kichler 16024CBR30 VLO Lámpara en otro idioma? Elija su idioma preferido en nuestra página de inicio y busque el número de modelo para ver si lo tenemos disponible.

Especificaciones

Marca Kichler
Modelo 16024CBR30 VLO
Categoría Lámparas
Tipo de archivo PDF
Tamaño del archivo 2.47 MB

Todos los manuales para Kichler Lámparas
Más manuales de Lámparas

Preguntas frecuentes sobre Kichler 16024CBR30 VLO Lámpara

Nuestro equipo de atención al cliente busca información útil sobre los productos y responde a las preguntas frecuentes. Si encuentra inexactitudes en las preguntas frecuentes, indíquenoslo usando nuestro formulario de contacto.

¿Es regulable toda la iluminación led? Verificado

No, no todas las bombillas led son regulables. Esto se indica en el embalaje o en la propia bombilla.

Ha sido de gran ayuda (462) Leer más

Puse una nueva luz en mi lámpara pero no se enciende, ¿por qué? Verificado

Algunas lámparas están hechas para fuentes de luz de un vataje específico. Cuando se inserta una fuente de luz que requiere una potencia superior a la que puede proporcionar la lámpara, es posible que la luz no se encienda. Si la lámpara entrega un vataje mucho más alto de lo que está hecha la fuente de luz, la fuente de luz puede quemarse.

Ha sido de gran ayuda (315) Leer más

¿Por qué es importante el color de la luz? Verificado

Ha sido de gran ayuda (255) Leer más

¿Qué significa lumen? Verificado

Lumen es una unidad de medida para la cantidad total de luz visible emitida por una fuente.

Ha sido de gran ayuda (190) Leer más

¿Cuáles son las bases de tornillo que existen? Verificado

Hay muchos tipos de bases de tornillo en el mundo, pero la mayor parte está basada en la rosca Edison, indicada por la letra E. En la mayor parte de los países las bases de tornillo E27 y E14 son las más comunes. En los Estados Unidos las E26, E17, E12 y E10 son estándar.

Ha sido de gran ayuda (142) Leer más

¿Qué dicen los vatios acerca de mi lámpara? Verificado

El vatio es una unidad de medida para el consumo de electricidad. Las lámparas que emiten más luz suelen consumir más vatios, pero para comparar la potencia luminosa siempre debe usar los lúmenes.

Ha sido de gran ayuda (113) Leer más

¿Qué significa led? Verificado

Led significa diodo emisor de luz. Al guiar la electricidad en la dirección correcta a través de un semiconductor, se emite la luz.

Ha sido de gran ayuda (98) Leer más
Manual de uso Kichler 16024CBR30 VLO Lámpara

Productos relacionados

Categorias relacionadas