Manual de uso Kichler 84322CG Jestin Lámpara

¿Necesita un manual para su Kichler 84322CG Jestin Lámpara? A continuación puedes ver y descargar el manual en PDF gratis en español. Este producto actualmente tiene 7 preguntas frecuentes, 0 comentarios y tiene 0 votos. Si este no es el manual que desea, , contáctenos.

¿Su producto tiene algún defecto y el manual no ofrece ninguna solución? Vaya a Repair Café para solicitar un servicio de reparación gratuito.

Manual de uso

Loading…

For warranty informaon please visit: kichler.com/warranty
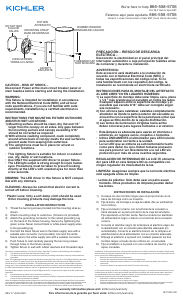
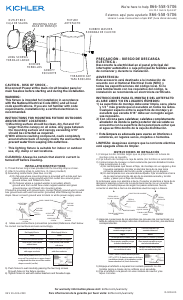
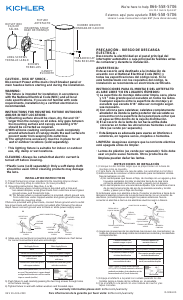
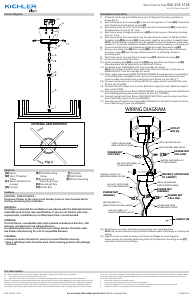
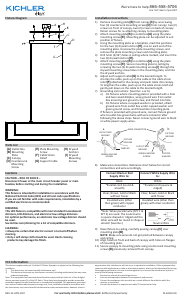
Fixture Diagram
Parts List
Cauons
CAUTION – RISK OF SHOCK –
Disconnect Power at the main circuit breaker panel or main
fusebox before starng and during the installaon.
WARNING:
This xture is intended for installaon in accordance with the
Naonal Electrical Code (NEC) and all local code specicaons.
If you are not familiar with code requirements, installaon by a
cered electrician is recommended.
DIMMING:
This LED xture is compable with most standard incandescent
dimmers, LED dimmers, and electronic low voltage dimmers.
For opmal performance, an electronic low voltage dimmer should
be used.
See kichler.com/dimming for a list of compable dimmers.
CLEANING:
• Always be certain that electric current is turned o before
cleaning.
• Only a so damp cloth should be used. Harsh cleaning
products may damage the nish.
[A] Outlet Box
[B] Mounting
Plate
[C] Canopy
[D] Countersunk
Mounting
Screw
[E] Plate Mounting
Screw
[F] Cable Strain
Relief
[G] Support Cable
[H] Drywall
Anchors
[I] Drywall
Mounting
Screws
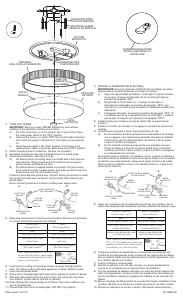
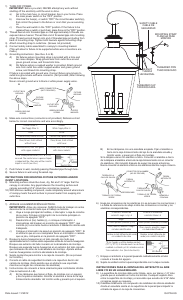
1) Remove mounng plate[B] from canopy[C] by unscrewing
four (4) countersunk mounng screws[D] from canopy: two (2)
screws on front of canopy, two (2) screws on back of canopy.
Retain screws for re-aaching canopy to mounng plate.
2) Aach mounng plate[B] to outlet box[A] using the plate
mounng screws[E]. Mounng plate can be adjusted to suit
posion of xture.
3) Using the mounng plate as a template, mark the posions
for the two (2) drywall anchors[H], one on each end of the
mounng plate. Unscrew the plate mounng screws, and
remove the plate mounng screws and mounng plate.
4) Drill 5mm (3/16”) holes in ceiling where marked, and insert the
two (2) drywall anchors[H].
5) Aach mounng plate[B] to outlet box[A] using the plate
mounng screws[E]. Secure mounng plate to ceiling by
screwing the two (2) drywall mounng screws[I] through the
drywall mounng screw holes in the mounng plate, and into
the drywall anchors.
6) Adjust each support cable[G] to the desired length. To
shorten the cable, push up on the cable at the cable strain
relief[F] aached to the canopy and push cable into canopy.
To lengthen the cable, push up on the cable strain relief and
gently pull down on the cable to the desired length.
7) Grounding instrucons: (See Illus. a or b).
a) On xtures where mounng plate is provided with a hole
and two raised dimples, wrap ground wire from outlet
box around green ground screw, and thread into hole.
b) On xtures where a cupped washer is provided, aach
ground wire from outlet box under cupped washer and
green ground screw, and thread into mounng plate.
If xture is provided with ground wire, connect xture ground
wire to outlet box ground wire with wire connector aer
following the above steps. Never connect ground wire to black
or white power supply wires.
8) Make wire connecons. Reference chart below for correct
connecons and wire accordingly.
Connect Black or Red
Supply Wire to:
Connect White Supply Wire
to:
Black White
*Parallel cord (round &
smooth)
*Parallel cord (square &
ridged)
Clear, Brown, Gold or Black
without Tracer
Clear, Brown, Gold or Black
with Tracer
Insulated wire (other
than green) with copper
conductor
Insulated wire (other than
green) with silver conductor
*Note: When parallel wire (SPT 1 &
SPT 2) are used. The neutral wire
is square shaped or ridged and the
other wire will be round in shape or
smooth (See illus.) Neutral Wire
9) Raise xture to ceiling, carefully passing canopy[C] over
mounng plate[B].
NOTE: Make sure wires do not get pinched between canopy
and ceiling.
10) Align holes on front and back of canopy with holes on anges
of mounng plate.
11) Secure canopy to mounng plate using countersunk mounng
screws[D] previously removed from canopy.
GREEN GROUND
SCREW
CUPPED
WASHER
OUTLET BOX
GROUND
FIXTURE
GROUND
DIMPLES
WIRE CONNECTOR
OUTLET BOX
GROUND
GREEN GROUND
SCREW
FIXTURE
GROUND
a
b
Installaon Instrucons
This device complies with part 15 of the FCC Rules. Operaon is subject to the following two
condions:
1) This device may not cause harmful interference, and
2) This device must accept any interference received, including interference that may cause
undesired operaon.
Note: This equipment has been tested and found to comply with the limits for a Class B digital
device, pursuant to part 15 of the FCC Rules. These limits are designed to provide reasonable
protecon against harmful interference in a residenal installaon. This equipment generates,
uses and can radiate radio frequency energy and, if not installed and used in accordance with
the instrucons, may cause harmful interference to radio communicaons. However, there is
no guarantee that interference will not occur in a parcular installaon. If this equipment does
cause harmful interference to radio or television recepon, which can be determined by turning
the equipment o and on, the user is encouraged to try to correct the interference by one or
more of the following measures:
Reorient or relocate the receiving antenna.
Increase the separaon between the equipment and receiver.
Connect the equipment into an outlet on a circuit dierent from that to which the
receiver is connected.
Consult the dealer or an experienced radio/TV technician for help.
FCC Informaon:
IS-84322-US
We’re here to help 866-558-5706
Hrs: M-F 9am to 5pm EST
REV 22-APR-2021
84322
A
E
B
D
C
F
G
H
I
Descargue el manual en Español (PDF, 0.48 MB)
(Piense en el medioambiente y solo imprima este manual si es de verdad necesario)

Loading…

Puntuación

Dé su opinión de la Kichler 84322CG Jestin Lámpara calificando el producto. ¿Quiere compartir su experiencia con este producto o hacer una pregunta? Deje un comentario en la parte inferior de la página.
¿Estás satisfecho con elKichler 84322CG Jestin Lámpara?
No
Sea el primero en calificar este producto
0 votos

Únase a la conversación sobre este producto

Aquí puedes compartir lo que piensas sobre Kichler 84322CG Jestin Lámpara. Si tiene alguna pregunta, primero lea atentamente el manual. Puede solicitar un manual utilizando nuestro formulario de contacto.

Más sobre este manual

Entendemos que es bueno tener un manual en papel para tus Kichler 84322CG Jestin Lámpara. Siempre puedes descargar el manual desde nuestro sitio web e imprimirlo tú mismo. Si deseas tener un manual original te recomendamos contactar con Kichler. Es posible que puedan proporcionar un manual original. ¿Estás buscando el manual de tu Kichler 84322CG Jestin Lámpara en otro idioma? Elija su idioma preferido en nuestra página de inicio y busque el número de modelo para ver si lo tenemos disponible.

Especificaciones

Marca Kichler
Modelo 84322CG Jestin
Categoría Lámparas
Tipo de archivo PDF
Tamaño del archivo 0.48 MB

Todos los manuales para Kichler Lámparas
Más manuales de Lámparas

Preguntas frecuentes sobre Kichler 84322CG Jestin Lámpara

Nuestro equipo de atención al cliente busca información útil sobre los productos y responde a las preguntas frecuentes. Si encuentra inexactitudes en las preguntas frecuentes, indíquenoslo usando nuestro formulario de contacto.

¿Es regulable toda la iluminación led? Verificado

No, no todas las bombillas led son regulables. Esto se indica en el embalaje o en la propia bombilla.

Ha sido de gran ayuda (495) Leer más

Puse una nueva luz en mi lámpara pero no se enciende, ¿por qué? Verificado

Algunas lámparas están hechas para fuentes de luz de un vataje específico. Cuando se inserta una fuente de luz que requiere una potencia superior a la que puede proporcionar la lámpara, es posible que la luz no se encienda. Si la lámpara entrega un vataje mucho más alto de lo que está hecha la fuente de luz, la fuente de luz puede quemarse.

Ha sido de gran ayuda (355) Leer más

¿Por qué es importante el color de la luz? Verificado

Ha sido de gran ayuda (288) Leer más

¿Qué significa lumen? Verificado

Lumen es una unidad de medida para la cantidad total de luz visible emitida por una fuente.

Ha sido de gran ayuda (228) Leer más

¿Cuáles son las bases de tornillo que existen? Verificado

Hay muchos tipos de bases de tornillo en el mundo, pero la mayor parte está basada en la rosca Edison, indicada por la letra E. En la mayor parte de los países las bases de tornillo E27 y E14 son las más comunes. En los Estados Unidos las E26, E17, E12 y E10 son estándar.

Ha sido de gran ayuda (172) Leer más

¿Qué dicen los vatios acerca de mi lámpara? Verificado

El vatio es una unidad de medida para el consumo de electricidad. Las lámparas que emiten más luz suelen consumir más vatios, pero para comparar la potencia luminosa siempre debe usar los lúmenes.

Ha sido de gran ayuda (149) Leer más

¿Qué significa led? Verificado

Led significa diodo emisor de luz. Al guiar la electricidad en la dirección correcta a través de un semiconductor, se emite la luz.

Ha sido de gran ayuda (130) Leer más
Manual de uso Kichler 84322CG Jestin Lámpara

Productos relacionados

Categorias relacionadas