Manual de uso Milwaukee 2867-22 Llave de impacto

¿Necesita un manual para su Milwaukee 2867-22 Llave de impacto? A continuación puedes ver y descargar el manual en PDF gratis en español. Este producto actualmente tiene 1 pregunta frecuente, 0 comentarios y tiene 0 votos. Si este no es el manual que desea, , contáctenos.

¿Su producto tiene algún defecto y el manual no ofrece ninguna solución? Vaya a Repair Café para solicitar un servicio de reparación gratuito.

Manual de uso

Loading…

4
ONE-KEY™ Indicator
Solid Blue Wireless mode is active and ready
to be congured via the ONE-KEY™
app.
Blinking Blue Tool is actively communicating with
the ONE-KEY™ app.
Blinking Red Tool is in security lockout and can
be unlocked by the owner via the
ONE-KEY™ app.
OPERATION
WARNING
To reduce the risk of injury, always
wear proper eye protection marked
to comply with ANSI Z87.1.
When working in dusty situations, wear appro-
priate respiratory protection or use an OSHA
compliant dust extraction solution.
Always remove battery pack before changing
or removing accessories. Only use accessories
specically recommended for this tool. Others
may be hazardous.
Using the Drive Control
The drive control button is used to adjust the torque,
rotation speed (RPM), and impact speed (IPM) for
the application.
To select the drive control mode:
Drive Control Button
Mode
Indicator
ONE-KEY™
1. Pull and release the trigger
to turn on the tool. The cur-
rent mode indicator is lit.
2. Press the drive control but-
ton to cycle through the
modes. Select wireless
to change the default set-
tings via the ONE-KEY
App on your smart device. When the desired mode
indicator is lit, begin work.
NOTE: Select the torque range in accordance with
the equipment manufacturers fastening instruc-
tions. For precision applications, conrm the nal
tightening torque with a calibrated device.
Mode RPM IPM Mode RPM IPM
1 0-1000 0-1330 3 0-1400 0-2100
2 0-1100 0-1620 4 0-1650 0-2450
Using the Control Switch
The control switch may be set to three positions:
forward, reverse and lock. Due to a lockout mecha-
nism, the control switch can only be adjusted when
the ON/OFF switch is not pressed. Always allow the
motor to come to a complete stop before using the
control switch.
Push for
Forward
Push for
Reverse
PUSH TO CENTER TO LOCK
1. For forward (clockwise) rotation, push the control
switch in the direction shown. Check the direction
of rotation before use.
2. For reverse (counterclockwise) rotation, push the
control switch in the direction shown. Check the
direction of rotation before use.
ASSEMBLY
WARNING
Recharge only with the charger
specied for the battery. For spe-
cic charging instructions, read the operators
manual supplied with your charger and battery.
Removing/Inserting the Battery
To remove the battery, push in the release buttons
and pull the battery pack away from the tool.
WARNING
Always lock the trigger or remove
the battery pack any time the tool
is not in use.
To insert the battery, slide the pack into the body
of the tool. Make sure it latches securely into place.
WARNING
Only use accessories specically
recommended for this tool. Others
may be hazardous.
Installing the Side Handle
Knob
Detents
Groove
1. To install the side handle, loosen the side handle
knob until the ring loosens.
2. Slide the ring over the front of the tool until the
detents are resting in the groove.
3. Tighten the side handle knob until it is secure.
4. To adjust the side handle, loosen the knob and
rotate to the desired position. Tighten securely.
5. To remove the side handle, loosen the side handle
knob until the side handle can be removed.
Attaching and Removing the Tool Hanger
1. To attach, place the hanger ring through the tool
hanger.
2. Position the tool hanger on the tool over the two
screw holes.
3. Insert the two screws. Hand tighten the screws.
4. To remove, reverse the procedure.
WARNING
Use only sockets and other acces-
sories specifically designed for
use on impact wrenches and drivers. Other
sockets and accessories might shatter or break
causing injury.
Attaching and Removing Accessories
1. Use only the appropriate size Square Drive Sockets.
2. To attach a socket, align the accessory with the
anvil and push it rmly over the retaining ring.
3. To remove the accessory, pull the accessory o󰀨
the anvil.
ONE-KEY™
To learn more about the ONE-KEY™ functionality
for this tool, go to milwaukeetool.com/One-Key. To
download the ONE-KEY™ app, visit the App Store or
Google Play from your smart device.
Descargue el manual en Español (PDF, 4.47 MB)
(Piense en el medioambiente y solo imprima este manual si es de verdad necesario)

Loading…

Puntuación

Dé su opinión de la Milwaukee 2867-22 Llave de impacto calificando el producto. ¿Quiere compartir su experiencia con este producto o hacer una pregunta? Deje un comentario en la parte inferior de la página.
¿Estás satisfecho con elMilwaukee 2867-22 Llave de impacto?
No
Sea el primero en calificar este producto
0 votos

Únase a la conversación sobre este producto

Aquí puedes compartir lo que piensas sobre Milwaukee 2867-22 Llave de impacto. Si tiene alguna pregunta, primero lea atentamente el manual. Puede solicitar un manual utilizando nuestro formulario de contacto.

Más sobre este manual

Entendemos que es bueno tener un manual en papel para tus Milwaukee 2867-22 Llave de impacto. Siempre puedes descargar el manual desde nuestro sitio web e imprimirlo tú mismo. Si deseas tener un manual original te recomendamos contactar con Milwaukee. Es posible que puedan proporcionar un manual original. ¿Estás buscando el manual de tu Milwaukee 2867-22 Llave de impacto en otro idioma? Elija su idioma preferido en nuestra página de inicio y busque el número de modelo para ver si lo tenemos disponible.

Especificaciones

Marca Milwaukee
Modelo 2867-22
Categoría Llaves de impacto
Tipo de archivo PDF
Tamaño del archivo 4.47 MB

Todos los manuales para Milwaukee Llaves de impacto
Más manuales de Llaves de impacto

Preguntas frecuentes sobre Milwaukee 2867-22 Llave de impacto

Nuestro equipo de atención al cliente busca información útil sobre los productos y responde a las preguntas frecuentes. Si encuentra inexactitudes en las preguntas frecuentes, indíquenoslo usando nuestro formulario de contacto.

¿Puedo guardar herramientas eléctricas en un cobertizo o garaje? Verificado

En general, las herramientas eléctricas se pueden guardar en un cobertizo o en un garaje, aunque a veces haga frío allí. Sin embargo, para prolongar la vida útil de la herramienta eléctrica, es mejor guardarla en un lugar seco y sin grandes fluctuaciones de temperatura. En un cobertizo o garaje, las diferencias de temperatura pueden provocar la formación de condensación, lo que puede provocar oxidación. Además, las herramientas que funcionan con baterías duran menos y no se cargan tan bien a temperaturas muy bajas. Para estar seguro de cómo debe almacenarse su herramienta eléctrica, lea siempre detenidamente el manual del usuario.

Ha sido de gran ayuda (10) Leer más
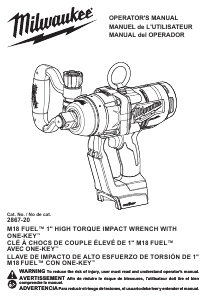
Manual de uso Milwaukee 2867-22 Llave de impacto

Productos relacionados

Categorias relacionadas