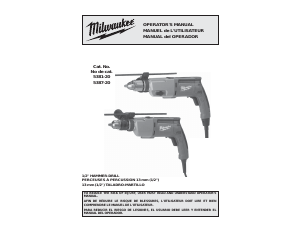
Manual de uso Milwaukee 5387-20 Taladradora de percusión

¿Necesita un manual para su Milwaukee 5387-20 Taladradora de percusión? A continuación puedes ver y descargar el manual en PDF gratis en español. Este producto actualmente tiene 3 preguntas frecuentes, 0 comentarios y tiene 0 votos. Si este no es el manual que desea, , contáctenos.

¿Su producto tiene algún defecto y el manual no ofrece ninguna solución? Vaya a Repair Café para solicitar un servicio de reparación gratuito.

Manual de uso

Loading…

6
7
ACCESSORIES
WARNING To reduce the risk of injury,
always unplug the tool before attaching or
removing accessories. Use only speci cally
recommended accessories. Others may be
hazardous.
WARNING To reduce the risk of injury,
electric shock and damage to the tool, never
immerse your tool in liquid or allow a liquid
to ow inside the tool.
MAINTENANCE
WARNING To reduce the risk of injury,
always unplug your tool before performing
any maintenance. Never disassemble the tool
or try to do any rewiring on the tool’s electrical
system. Contact a MILWAUKEE service facility
for ALL repairs.
OPERATION
Selecting Action
MILWAUKEE Hammer-Drills have two settings:
drilling and hammer-drilling.
1. For drilling, turn the hammer-drill lever to the
drill symbol.
2. For hammer-drilling, turn the hammer-drill lever
to the hammer symbol.
NOTE: To engage the hammering mechanism,
maintain pressure on the bit. When pressure on
the bit is released, the hammering action will stop.
Using Forward/Reverse Lever
The forward/reverse
lever can only be ad-
justed when the trig-
ger is not pressed.
Always allow the motor
to come to a complete
stop before using the
forward/reverse lever.
1. For forward (clock-
wise) rotation, push
the forward/reverse
lever to the left
(when viewed from
the back of the tool)
as shown.
2. For reverse (counterclockwise) rotation, push
the forward/reverse lever to the right (when
viewed from the back of the tool) as shown. Allow
the motor to come to a full stop before reversing.
NOTE: When hammer-drilling, use the tool in for-
ward rotation (clockwise) only.
Selecting Speed (Cat. No. 5387-20 only)
The speed can only be changed when the tool is
at a complete stop.
1. For high torque/low speed (up to 1000 rpm),
turn the speed selector to position 1.
2. For low torque/high speed (up to 2500 rpm),
turn the speed selector to position 2.
Starting, Stopping & Controlling Speed
1. To start the tool, pull trigger.
2. To stop the tool, release trigger.
3. To vary the speed, increase or decrease pres-
sure to trigger. The further the trigger is pulled,
the greater the speed.
WARNING To reduce the risk of injury,
wear safety goggles or glasses with side
shields. Unplug the tool before changing
accessories or making adjustments.
Fig. 6
Forward
Reverse
APPLICATIONS
Drilling in Wood, Composition Materials and
Plastic
When drilling in wood, composition materials and
plastic, select the drill operating mode. Start the drill
slowly, gradually increasing speed as you drill. Se-
lect low speeds for plastics with a low melting point.
Drilling in Metal
When drilling in metal, select the drill operating
mode. Use high speed steel twist drills or hole saws.
Use a center punch to start the hole. Lubricate drill
bits with cutting oil when drilling in iron or steel. Use
a coolant when drilling in nonferrous metals such
as copper, brass or aluminum. Back the material
to prevent binding and distortion on breakthrough.
Drilling in Masonry
When drilling in masonry, select the hammer-drill
operating mode. Use high speed carbide-tipped
bits. Drilling soft masonry materials such as cinder
block requires little pressure. Hard materials like
concrete require more pressure. A smooth, even
ow of dust indicates the proper drilling rate. Do
not let the bit spin in the hole without cutting. Do
not use water to settle dust or to cool bit. Do not
attempt to drill through steel reinforcing rods. Both
actions will damage the carbide.
WARNING To reduce the risk of electric
shock, check work area for hidden pipes and
wires before drilling.
Maintaining Tools
Keep your tool in good repair by adopting a regular
maintenance program. Before use, examine the
general condition of your tool. Inspect guards,
switches, tool cord set and extension cord for dam-
age. Check for loose screws, misalignment, binding
of moving parts, improper mounting, broken parts
and any other condition that may affect its safe oper-
ation. If abnormal noise or vibration occurs, turn the
tool off immediately and have the problem corrected
before further use. Do not use a damaged tool.
Tag damaged tools “DO NOT USE” until repaired
(see “Repairs”).
Under normal conditions, relubrication is not neces-
sary until the motor brushes need to be replaced.
After six months to one year, depending on use,
return your tool to the nearest MILWAUKEE service
facility for the following:
Lubrication
Brush inspection and replacement
Mechanical inspection and cleaning (gears,
spindles, bearings, housing, etc.)
Electrical inspection (switch, cord, armature, etc.)
Testing to assure proper mechanical and electrical
operation
Cleaning
Clean dust and debris from vents. Keep the tool
handles clean, dry and free of oil or grease. Use
only mild soap and a damp cloth to clean your tool
since certain cleaning agents and solvents are
harmful to plastics and other insulated parts. Some
of these include: gasoline, turpentine, lacquer thin-
ner, paint thinner, chlorinated cleaning solvents,
ammonia and household detergents containing
ammonia. Never use ammable or combustible
solvents around tools.
Repairs
If your tool is damaged, return the entire tool to the
nearest service center.
For a complete listing of accessories refer to your
MILWAUKEE Electric Tool catalog or go on-line
to www.milwaukeetool.com. To obtain a catalog,
contact your local distributor or a service center.
Side Handle
Cat. No. 49-15-5300
Depth Gauge
Cat. No. 48-66-5185
Operating
Position the tool, grasp the handles rmly and pull
the trigger. Always hold or brace the tool securely
using both handles and maintain control. This tool
has been designed to achieve top performance with
only moderate pressure. Let the tool do the work.
If the speed begins to drop off when drilling deep
holes, pull the bit partially out of the hole while the
tool is running to help clear dust. Do not use water
to settle the dust since it will clog the bit utes and
tend to make the bit bind in the hole.
Descargue el manual en Español (PDF, 0.28 MB)
(Piense en el medioambiente y solo imprima este manual si es de verdad necesario)

Loading…

Puntuación

Dé su opinión de la Milwaukee 5387-20 Taladradora de percusión calificando el producto. ¿Quiere compartir su experiencia con este producto o hacer una pregunta? Deje un comentario en la parte inferior de la página.
¿Estás satisfecho con elMilwaukee 5387-20 Taladradora de percusión?
No
Sea el primero en calificar este producto
0 votos

Únase a la conversación sobre este producto

Aquí puedes compartir lo que piensas sobre Milwaukee 5387-20 Taladradora de percusión. Si tiene alguna pregunta, primero lea atentamente el manual. Puede solicitar un manual utilizando nuestro formulario de contacto.

Más sobre este manual

Entendemos que es bueno tener un manual en papel para tus Milwaukee 5387-20 Taladradora de percusión. Siempre puedes descargar el manual desde nuestro sitio web e imprimirlo tú mismo. Si deseas tener un manual original te recomendamos contactar con Milwaukee. Es posible que puedan proporcionar un manual original. ¿Estás buscando el manual de tu Milwaukee 5387-20 Taladradora de percusión en otro idioma? Elija su idioma preferido en nuestra página de inicio y busque el número de modelo para ver si lo tenemos disponible.

Especificaciones

Marca Milwaukee
Modelo 5387-20
Categoría Taladradoras de percusión
Tipo de archivo PDF
Tamaño del archivo 0.28 MB

Todos los manuales para Milwaukee Taladradoras de percusión
Más manuales de Taladradoras de percusión

Preguntas frecuentes sobre Milwaukee 5387-20 Taladradora de percusión

Nuestro equipo de atención al cliente busca información útil sobre los productos y responde a las preguntas frecuentes. Si encuentra inexactitudes en las preguntas frecuentes, indíquenoslo usando nuestro formulario de contacto.

¿Cuál es la diferencia entre un taladro de impacto y un martillo perforador? Verificado

Los taladros de impacto se pueden utilizar para hacer agujeros en paredes de ladrillos y mortero. Para perforar agujeros en paredes de hormigón se necesita un martillo perforador.

Ha sido de gran ayuda (134) Leer más

¿Necesito usar protección auditiva cuando utilizo un taladro? Verificado

Si deberías. Aunque la cantidad de ruido producido por un taladro puede variar entre marcas y modelos, la exposición prolongada a ruidos fuertes puede causar daños auditivos permanentes. Por eso es una buena idea usar protección auditiva.

Ha sido de gran ayuda (24) Leer más

¿Puedo guardar herramientas eléctricas en un cobertizo o garaje? Verificado

En general, las herramientas eléctricas se pueden guardar en un cobertizo o en un garaje, aunque a veces haga frío allí. Sin embargo, para prolongar la vida útil de la herramienta eléctrica, es mejor guardarla en un lugar seco y sin grandes fluctuaciones de temperatura. En un cobertizo o garaje, las diferencias de temperatura pueden provocar la formación de condensación, lo que puede provocar oxidación. Además, las herramientas que funcionan con baterías duran menos y no se cargan tan bien a temperaturas muy bajas. Para estar seguro de cómo debe almacenarse su herramienta eléctrica, lea siempre detenidamente el manual del usuario.

Ha sido de gran ayuda (9) Leer más
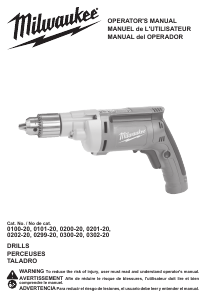
Manual de uso Milwaukee 5387-20 Taladradora de percusión

Productos relacionados

Categorias relacionadas

×
Download