1
2
3
4
6
5
7
8
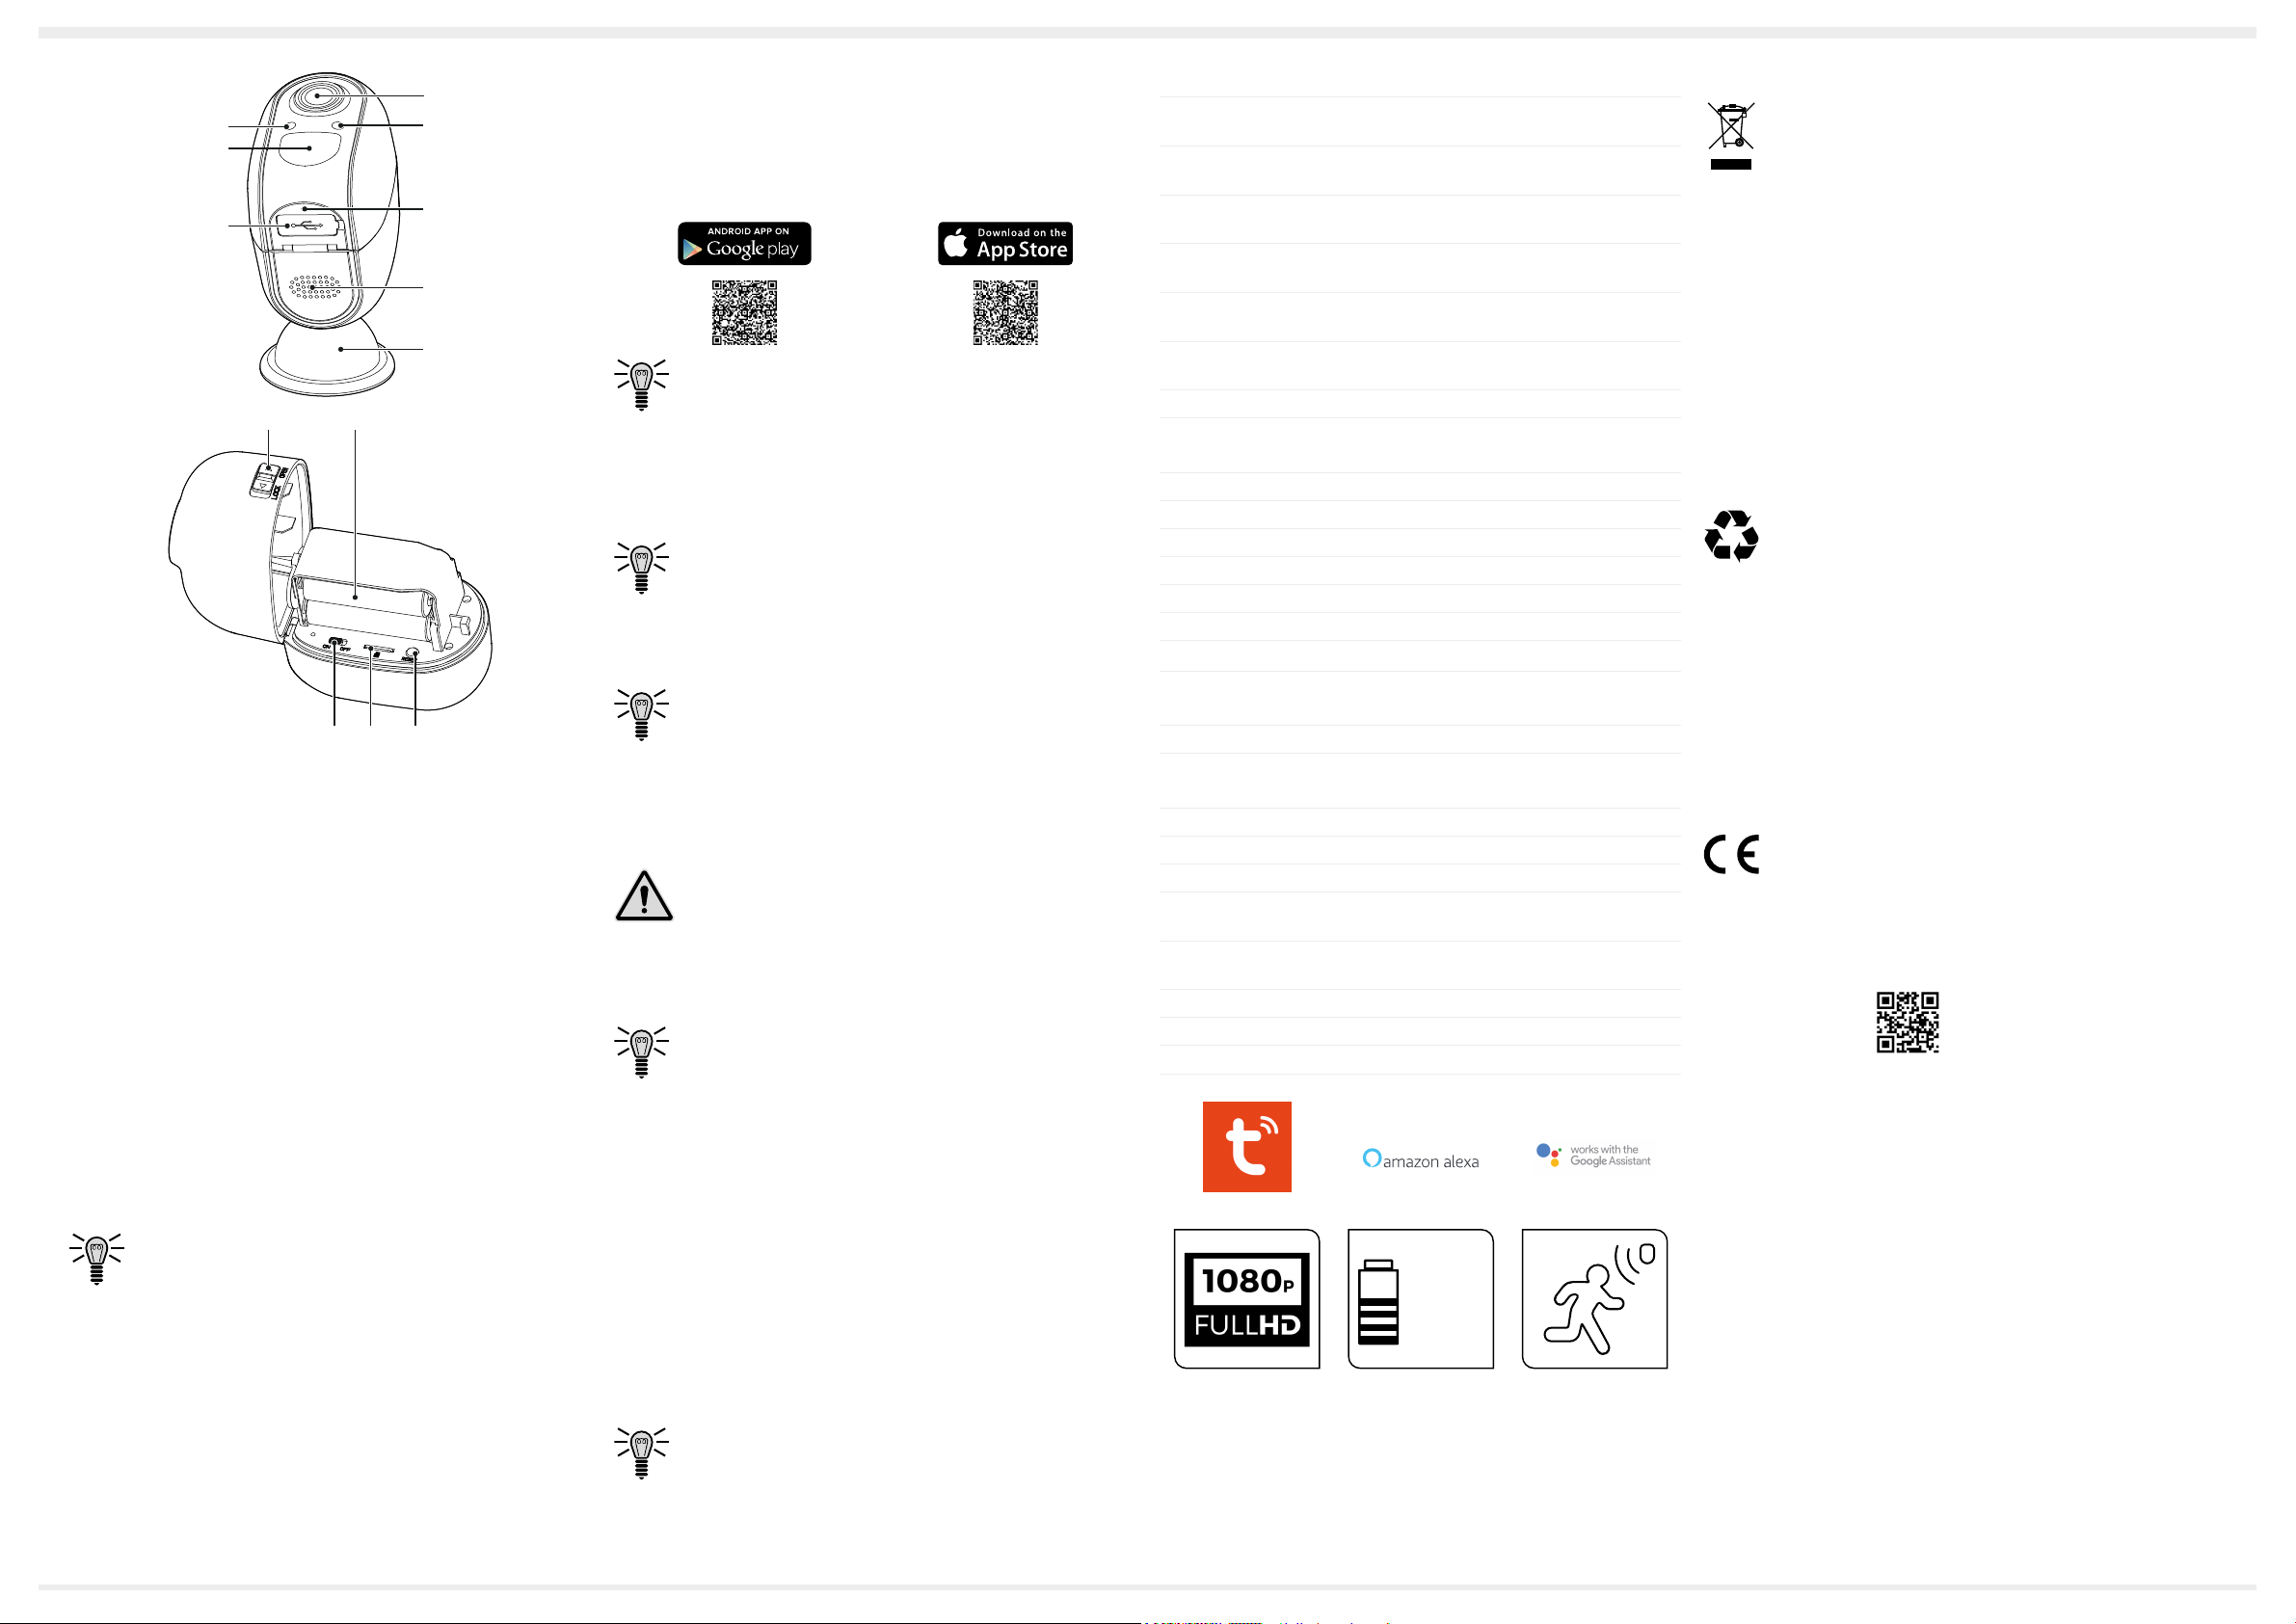
1. Slide the switch (9) to the OPEN setting to unlock the camera.
2. Pivot the camera up.
3. Pivot the camera down.
4. Slide the switch (9) to the LOCK setting to lock the camera.
Inserting the Battery
The camera only works with correctly installed batteries. The batte-
ries (4 × 1.5 V, AA) are not contained in the package supplied.
1. Open the camera.
2. Insert the batteries as illustrated in the battery compart-
ment (10) paying attention to correct polarity.
3. Close the camera.
The camera is switched on and o using the (13).
1. Open the camera.
2. Slide the (13) to its ON setting.
3. Close the camera.
Wait for a voice message from the camera. The camera is
ready for connecting. The LED (2) ashes blue/red.
4. If necessary, slide the (13) to its OFF setting to switch
the camera o.
Installing the "Smart Living" Tuya-App
To dene further settings on the camera and a connection to your
home network (wi), follow the instructions provided by the "Smart
Living" Tuya app.
1. Download the "Smart Living" Tuya app from the App Store or
Google Play Store or scan this QR code.
In the case of question and problems involving the "Smart
Living" Tuya app, please contact Tuya (www.tuya.com).
Inserting a MicroSD Card (Option)
You can install an optional microSD card to store recordings made
by the camera. There is no microSD card contained in the package
supplied.
When inserting the microSD card, pay attention it is
correctly aligned (refer to the pictogram on the microSD
card slot (12)).
1. Open the camera.
2. Insert the microSD card in the microSD card slot (12).
3. Close the camera.
To remove the microSD card, press on the microSD card.
The microSD card is unlocked and can be removed. The
recordings can also be read out via the USB port (6).
Assembling the Magnetic Holder (Option)
The camera can be installed on a wall.
1. Ensure that there are no electric cables, gas or water pipes
near the installation location.
! Risk of fatal injury from electric shock or gas
explosion! During installation, pay attention to the possibili-
ty of electrical cables and gas pipes running in the walls.
Pay attention that you do not damage electric cables or
gas pipes.
2. Drill a hole at the required position and insert an appropriate
dowel.
We recommend the use of special dowels according to the
properties of the mounting surface.
3. Screw the screw in the dowel. Pay attention that the screw
projects about 3 mm from the wall.
4. Fit the magnetic holder (5) on the screw. Use the recess on the
back of the magnetic holder (5).
5. Position the camera on the magnetic holder (5).
Resetting the Camera
You can reset the camera settings. As a result, the connections to
your wi system and the "Smart Living" Tuya app are disconnected
and all recordings are deleted.
1. Open the camera.
2. Press and hold the RESET button (11) until you hear a voice
message from the camera.
3. Close the camera.
Wait for a voice message from the camera. The camera
has been reset. The camera is ready for connecting. The
LED (2) ashes blue/red.
Technical Data
Weight Approx. 120 g (without accessories and
batteries)
Dimensions
(H × W × D)
Approx. 76.5 × 52 × 79 mm
(without accessories)
Permissible ambient
conditions
-10 °C to +50 °C
Transmission frequen-
cy
2.4 GHz (wi)
(max.):
63.1 mW (wi)
4 × AA, 1.5 V (not contained in package
supplied)
Battery service life Up to 3 months
4 Glass, DFOV120 /
2 MP, 1/2,7" CMOS sensor (colour)
Resolution Max. 1920 × 1080 pixel
Image compression H.264
Image refresh rate 15 FPS max.
Night vision IR LED, range up to 8 meters
Angle of vision 120°
Motion detection PIR sensor
Type of protection IP 54
Ports MicroSD card (max. 64 GB)
Micro-USB port
IEEE 802.11 b/g/n, 2.4 G
Range Approx. 15 m with obstructions
Approx. 80 m open space
Encryption WPA and WPA2
Microphone Yes
Loudspeaker Yes (8 Ohm, 1 W)
Audio and video Intercom function
two-way audio
App (3 - 5 s)
PIR motion detection (0.6 - 1.5 s)
Update App or MicroSD/TF card
Smart Living
Support Amazon Alexa, Google Home
Tuya Smart
WORKS WITH
4x
AA*
Disposal
Dispose of the device at collection points provided by your
local waste authorities (e.g. recycling centre). According to
laws on the disposal of electronic and electrical devices,
owners are obliged to dispose of old electronic and
electrical devices in a separate waste container. The
symbol indicates that the device must not be disposed of in
normal domestic waste!
Risks to health and the environment from batteries! Never
open, damage or swallow batteries or allow them to pollute
the environment. Batteries may contain toxic, ecologically
hazardous heavy metals.
Remove the batteries from the equipment before disposing
of the device. You are legally obliged to dispose of batteries
at shops which sell batteries or at collection points provided
by the public waste authorities. Disposal is free of charge.
The symbol indicates that batteries must not be disposed
of in normal domestic waste and that they must be brought
to collection points provided by local public waste authori-
ties.
Packaging materials must be disposed of according to local
regulations.
Care Instructions
Clean the surface of the housing and camera lens with a soft, lint-
free cloth. Do not use any solvents or cleaning agents.
Warranty
Dear customer,
we are delighted that you have chosen this equipment.
In the case of a defect, please return the device together with the
receipt and original packing material to the point of sale.
Information on Conformity
Olympia Business Systems Vertriebs GmbH, Zum Kraft-
werk 1, 45527 Hattingen hereby declares that these
devices full the basic requirements and other relevant
provisions stipulated in the Directive 2014/53/EU. The CE
Mark on the devices conrms conformity.
More detailed information on this product is available at
or scan this QR code:


Únase a la conversación sobre este producto
Aquí puedes compartir lo que piensas sobre Olympia OC 1000 IP Cámara IP. Si tiene alguna pregunta, primero lea atentamente el manual. Puede solicitar un manual utilizando nuestro formulario de contacto.