English-4English-3
3.
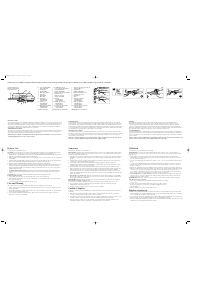
Holding the blades with the drip guards
between the thumb and forefinger, and
with the scalloped edges of the blades
facing away from the hand, slide the
ends of the blades into the opening on
the front of power handle. DO NOT
PRESS THE BLADE RELEASE BUTTON
WHEN INSERTING THE BLADES.
4. Push gently on each drip guard towards
the electric carving knife until the blades
“click” into place. Make sure the blades
are firmly engaged. Cutting edges of the
blades should be facing downward,
away from the handle. (Figure C)
5. Plug the electrical cord into an electrical
outlet. Use only voltage specified on
bottom of the unit.
6. Press and hold the On-Off switch located on
top of the handle to activate the knife and
begin carving. (Figure D)
7. Guide the knife blades through the food
to be sliced, pressing down lightly. A back
and forth sawing motion is unnecessary.
The movement of the blades slices the
food for you.
8. When slicing is complete, release the
On-Off switch to stop the blade action.
Unplug the cord from the electrical outlet.
CLEANING YOUR ELECTRIC CARVING KNIFE
Unplug cord from the electrical outlet.
Press the blade release button and gently remove both blades from the knife
using the drip guards. Slide the blades apart so the rivet on one blade is
disengaged from the key-hole slot on the other blade.
Hold blades by the drip guards and wash in warm, sudsy water. Rinse blades
and dry thoroughly. Be careful – blades are SHARP. The blades are dishwasher safe.
Wipe unit with a damp cloth.
DO NOT IMMERSE THE UNIT IN
WATER OR OTHER LIQUIDS.
S
TORAGE
Coil the electrical cord of the knife with a twist fastener. Store the knife in the
storage case in a clean, dry location such as a cabinet or cupboard shelf. Slide
plastic cover over blades and store blades in a drawer.
M
AINTENANCE
Do not attempt to sharpen the knife blades. Under normal use and care they
will provide years of satisfactory use.
The motor of your electric slicing knife has been carefully lubricated at the
factory using selected lubricants. It does not require any additional oil for the
life of the unit.
Other than the recommended cleaning, no further user maintenance is
necessary. Return
the electric slicing knife to your nearest authorized service
center for servicing or repairs.
TIPS FOR CARVING WITH THE ELECTRIC CARVING KNIFE
Use a carving board to avoid scratching china, metal platters or countertops.
Allow a roast to stand 15 to 20 minutes after roasting. Keep in a warm place.
The meat will be easier to carve. Use a fork to hold meat when carving.
Remove all skewers from the meat before carving.
CARVING A STANDING RIB ROAST OF BEEF
Suggestions: Have your butcher remove the backbone of the roast and cut the
rib bones short.
Arrange the roast on a cutting board with the largest end of the roast down
and the rib side to your left. The small end of the roast is nearest the carver.
Insert a carving fork between the two top ribs.
Slice across the roast from the fat edge of the rib bone. Free the slice from the
bone using the special “trimming tip” of the knife.
CARVING A WHOLE HAM OR ROAST LEG OF LAMB
Place the leg of lamb or whole ham on the carving board with the shank end to
the right of the carver. For a ham, turn the scored, fat-side up. For the leg of
lamb, place the roast so that the meaty section faces away from the carver.
Insert a meat fork into the heavy part of the meat and cut several lengthwise
slices from the less meaty side.
FIGURE B
FIGURE C
FIGURE D




Únase a la conversación sobre este producto
Aquí puedes compartir lo que piensas sobre Oster 2802 Cuchillo eléctrico. Si tiene alguna pregunta, primero lea atentamente el manual. Puede solicitar un manual utilizando nuestro formulario de contacto.