ISTRUZIONI DI MONTAGGIO, D’USO E MANUTENZIONE
Prima dell’installazione e messa in funzione.
Attenzione! I tubi d’alimentazione devono essere sciacquati con cura prima dell’installazione del miscelatore, in modo che non rimangano trucioli,
residui di saldatura o canapa, o altre impurità all’interno dei tubi. Attraverso tubazioni non sciacquate a fondo o attraverso la rete idrica generale,
nel miscelatore possono entrare corpi estranei in grado di danneggiare le guarnizioni/guarnizioni ad anello. Al ne di garantire una lunga durata del
prodotto installare i rubinetti sottolavabo dotati di ltro, da pulire periodicamente Prima della messa in funzione, svitare l’aeratore e sciacquare molto
bene.
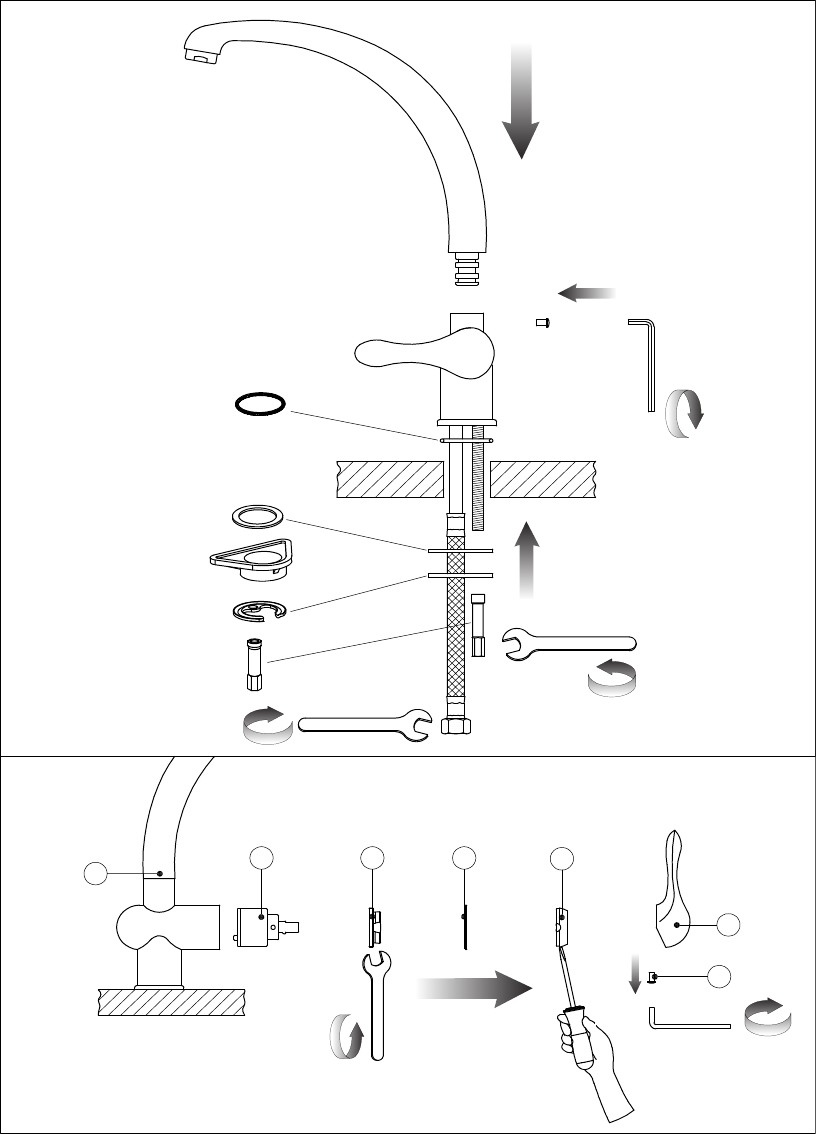
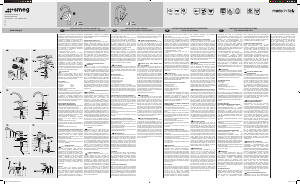
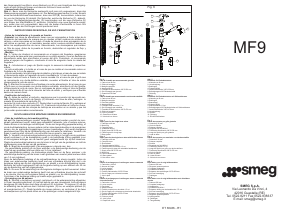
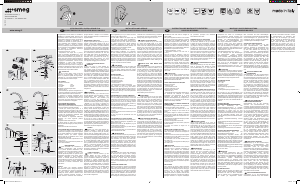
Fig. 1
Prima di inserire il monocomando nel foro del lavello assicurarsi che la guarnizione di base sia ben posizionata nella propria sede e che i essibili
di alimentazione siano ben avvitati al corpo del rubinetto. Sistemare il monocomando sul foro del lavello orientando la bocca di erogazione verso la
vasca del lavello. Inserire quindi il kit di ssaggio nella sequenza indicata e rispettivamente:
· la guarnizione sagomata e la angia nel caso si installi il monocomando su un lavello di spessore 3-4 cm;
· la guarnizione sagomata, la angia triangolare in plastica e la angia nel caso si installi il monocomando su un lavello in acciaio inox di spessore
1-2 mm.
Serrare a fondo l’apposito tirante o dado lettato. Per i rubinetti girevoli allentare la vite della boccola sul corpo ed inserire la canna no a battuta.
Fissare di nuovo la vite in modo da assicurare la canna nella sua sede. Procedere al collegamento dei essibili alla rete di alimentazione.
Fig. 2 - SOSTITUZIONE DELLA CARTUCCIA
Prima di sostituire la cartuccia, accertarsi che il raccordo dell’acqua sia chiuso. Svitare la vite di ssaggio (A) utilizzando una chiave a brugola, estrarre
quindi la maniglia (B) slandola dalla cartuccia (F). Sollevare la ghiera copricartuccia (C) facendo leva (come in gura) tramite l’apposita scanalatura
di riferimento. Allontanare l’anello indicatore (D), svitare la ghiera di ssaggio (E) e togliere la cartuccia (F) dal corpo del miscelatore (G). Inne intro-
durre la nuova cartuccia, accertandosi che le due spine di centraggio siano nella loro sede e che le guarnizioni siano correttamente posizionate.
PULIZIA DEL MISCELATORE
Supercie: le superci cromate sono sensibili a detergenti anti-calcare, acidi o abrasivi. Le superci colorate sono verniciate con una speciale
laccatura a fuoco e non devono in nessun caso essere pulite con detergenti acidi, abrasivi o contenenti alcol. Pulire solo con acqua ed un panno
morbido/pelle!
Miscelatore: pulire regolarmente l’aeratore (rompigetto), in modo che il getto dell’acqua rimanga forte e non si formi alcun residuo nel miscelatore che
possa causare un gocciolamento. Per effettuare quest’operazione, svitare l’aeratore (rompigetto) e lasciarlo qualche ora in acqua e aceto. Eliminare
i residui di calcare e avvitare nuovamente l’aeratore (non dimenticare la guarnizione). Qualora non si osservassero queste istruzioni decadrebbero
i diritti di garanzia.
INSTALLATION, USE AND MAINTENANCE INSTRUCTIONS
Before installation and setting to work
Attention! The feeding pipes have to be rinsed thoroughly before the installation of the mixer, so that no shavings, welding or hemp residual or other
dirt can be found in the pipes. Foreign bodies can enter the mixer through the rinsed pipes or the general water plant and could damage the washers/
ring washers. In order to guarantee a long use of the product, install the angle valve equipped with lter and clean them regularly. Before the setting
to work, unscrew the aerator and rinse it very well.
Fig. 1
Before inserting the single lever group in the hole of the sink, make sure that the base gasket is properly positioned in its seat and that the exible
hoses are well tightened to the body of the tap. Place the single lever group in the hole of the sink, orienting the spout toward the sink tank. Insert the
xing kit with the indicated sequence, and respectively:
· the shaped gasket and ange in case the single lever group is installed on a sink having thickness of 3-4 cm;
· the shaped gasket, the triangular plastic ange and the ange in case of a stainless steel sink having thickness of 1-2 mm.
Tighten well the tie rod or the threaded nut. For swivelling taps, loose the screw of the bush on the body and introduce the tube till the beating. Fix the
screw again in order to assure that the tube is in its seat. Proceed connecting the exible hoses to the plumbing.
Fig. 2 - CARTRIDGE REPLACEMENT
Before carrying out this operation make sure that water supply is turned off. Unscrew the fastening screw (A) using an Allen key, remove the handle
(B) from the cartridge (F). Lift the nishing ring nut (C) using the reference notch (as shown in the gure). Remove the indicator ring (D), unscrew the
xing ring nut (E) and take the cartridge (F) out from the mixer body (G). Put the new cartridge into the body checking that the two centering pins enter
into the respective seats and that gaskets are well positioned.
MIxER CLEANING
Surfaces: the chromed surfaces can’t stand anti-calcareous, acid or abrasive detergents. The coloured surfaces are painted with a particular ame
enamelling and should never cleaned with acid, abrasive of alcohol contained detergents. Clean only with water and a soft/leather cloth!
Mixer: clean regularly the aerator (jet breaker), so that the water jet will remain strong in order not form some residue in the mixer, thus causing
dripping. In order to carry out this operation, unscrew the aerator (jet breaker) and leave it in a mixture of water and vinegar for some hours. Remove
the calcareous residues and screw the aerator (don’t forget the washer) on again. If these instructions aren’t observed, the warranty rights will be
forfeited.
INSTRUCTIONS DE MONTAGE, D’EMPLOI ET D’ENTRETIEN
Avant l’installation et la mise en fonction.
Attention! Les tubes d’alimentation doivent être rincés avec soin avant l’installation du mélangeur, de façon qu’il ne reste pas de riblons, de restes
de soudure ou de chanvre, ou d’autres saletés à l’intérieur des tubes. A travers les tuyauteries qui ne sont pas bien rincées ou à travers l’installation
hydrique générale, des corps étrangers peuvent entrer dans le mélangeur et abîmer les joints/ les joints à anneau. Dans le but de garantir une longue
durée du produit, instaure les robinets sous lavabo munis du ltre et nettoie-les régulièrement. Avant la mise en fonction, dévisser l’aérateur et bien
rincer.
Fig. 1
Avant d’insérer le monocommande dans le trou de l’évier, il faut s’assurer que le joint de base est bien placé dans son emplacement et que les exi-
bles d’alimentation sont bien vissés au corps du robinet. Il faut placer le monocommande sur le trou de l’évier en orientant la bouche de distribution
vers le bac de l’évier. Insérer donc le kit de xage dans la séquence indiquée et respectivement:
· le joint façonné et la bride si on installe le monocommande sur un évier d’une épaisseur de 3-4 cm;
· le joint façonné, la bride triangulaire en plastique et la bride dans le cas d’un évier en acier inox d’une épaisseur de 1-2 mm.
Serrer à fond le tirant ou l’écrou leté. Pour les robinettes tournantes desserrer le vis de la buse sur le corps et introduis le tuyau jusqu’à la butée.
Fixer de nouveau le vis pour s’assurer le tuyau dans le siège. Procéder à la liaison des exibles au réseau d’alimentation.
Fig. 2 - SUBSTITUTION DE LA CARTOUCHE
Avant d’effectuer la substitution de la cartouche, vérier que la connexion de l’eau est fermée. Dévisser la vis de xation (A) utilisant une clé à griffe,
extraire en suite la poignée (B) en la soulevant de la cartouche (F). Soulever la virole de nition (C) en utilisant (comme indiqué en la gure) la rainure
de référence. Quitter la bague d’indication (D), dévisser la virole de xation (E) et enlever la cartouche (F) du corps de mitigeur (G). Introduire enn la
cartouche nouvelle, en vériant que les deux pivots de centrage entrent dans les sièges respectifs et que les garnitures sont bien positionnées.
NETTOYAGE DU MÉLANGEUR
Surface: les surfaces chromées sont sensibles aux détergents anti-calcaires, acides ou abrasifs. Les surfaces colorées sont vernies avec une un
dimensioni in mm - measures in mm - dimensions en mm - Maß im mm - medidas en milímetros - maatregelen in mm
11 mm
19 mm
1-2 mm
3 mm
28 mm 2,5 mm



Únase a la conversación sobre este producto
Aquí puedes compartir lo que piensas sobre Smeg MF8RA2 Grifería. Si tiene alguna pregunta, primero lea atentamente el manual. Puede solicitar un manual utilizando nuestro formulario de contacto.