Manual de uso Tommee Tippee 1069 Esterilizador

¿Necesita un manual para su Tommee Tippee 1069 Esterilizador? A continuación puedes ver y descargar el manual en PDF gratis en español. Este producto actualmente tiene 4 preguntas frecuentes, 0 comentarios y tiene 0 votos. Si este no es el manual que desea, , contáctenos.

¿Su producto tiene algún defecto y el manual no ofrece ninguna solución? Vaya a Repair Café para solicitar un servicio de reparación gratuito.

Manual de uso

Loading…

Before using your closer to nature steam sterilizer, please ensure that you
read all instructions thoroughly. Please save this instruction sheet for future
reference as it includes important information.
This sterilizer is designed for use with tommee tippee® closer to nature®
bottles and feeding accessories (except bottle brush). The sterilizer will hold
up to 6 closer to nature® bottles, plus accessories.
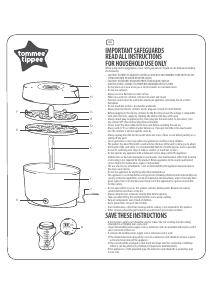
PARTS GUIDE (see diagram)
A
Removable lower tray
B
Removable upper tray
C
Central Stem
D
Locator for closer to nature® bottle neck
E
Locator for closer to nature® anti-colic valve (if sterilizing closer to nature®
anti-colic bottles)
F
Locator for closer to nature® screw ring and nipple
G
Locator for bottle hood
H
Sterilizer lid
I
Sterilizer base
J
Electric cord with plug
K
Start switch and sterilizing light
L
Steam vents
M
2.7 fl oz / 80ml measurement on closer to nature® bottle
IMPORTANT INSTRUCTIONS FOR SETTING UP YOUR STERILIZER BEFORE FIRST USE:
Do not connect to power at this stage.
Remove all items from inside the sterilizer base.
Pour exactly 2.7 fl.oz / 80ml of water into the sterilizer base.
Your closer to nature® bottles have a handy measure.
Assemble the white lower tray (A), central stem (C) and upper tray (B) and
place in the sterilizer base.
Add the lid.
Plug the electric cord into your electric outlet. The start switch and
sterilizing light should come on automatically. If it does not then press the
switch and it will light up amber to show that sterilizing has begun.
The light will switch off when sterilizing has finished.
Allow to cool for 3 minutes before unplugging.
Remove lower tray, central stem and upper tray, pour away any remaining
water and wipe dry. Your sterilizer is now ready for use.
FOR INSTRUCTIONS ON HOW TO CLEAN AND STERILIZE THE TOMMEE TIPPEE®
CLOSER TO NATURE® BOTTLES, PLEASE SEE SEPARATE LEAFLET.
USING THE ELECTRIC STEAM STERILIZER
Preheating of the appliance is not necessary.
Before sterilization, wash all bottles and feeding accessories in warm soapy
water or in a dishwasher (top rack only) to remove any milk residues.
Separate all components for washing and reassemble nipple and screw ring
for sterilizing.
WARNING: DO NOT ALLOW PRODUCT TO COME INTO CONTACT WITH OIL
BASED FOODS (e.g. OIL/TOMATO BASED SAUCES) AS STAINING WILL OCCUR.
PROBLEM CHECK
Sterilizer will not work Check the electrical cord is plugged into the unit and
the electrical outlet is switched on.
Check the electrical outlet by plugging in another
appliance.
Excessive steam
Items incorrectly loaded in sterilizer. Refer to
Instructions for Use.
Bottles come out with mark
Sterilizer needs descaling. Refer to Cleaning Instructions.
Cycle takes too long to complete
Too much water in sterilizer. Use exactly 2.7 fl.oz / 80ml
1
8
16
9
10
Slot the hoods into
the hood locators of
the removable upper
tray so that they hang
over the nipple and
screw ring but are not
fully assembled.
Place the assembled
nipple and screw ring in
the locators of the
removable upper tray. It
is important not to have
the hoods fitted onto the
nipple and screw ring.
6
7
6
Pour exactly 2.7 fl.oz/
80ml of water into the
sterilizer base. Your closer
to nature® bottles have a
handy 80ml measure.
WARNING: MORE THAN
80ML OF WATER IN THE
STERILIZER BASE WILL
PROLONG THE CYCLE
TIME. LESS THAN 80ML
MAY NOT STERILIZE
ITEMS PROPERLY.
Assemble central
stem and lower tray
into the sterilizer base.
Place the bottles neck
downwards into the
locators of the removable
lower tray. If using closer
to nature® anti-colic
bottles, place bottle parts
in the locators as shown.
Fit the removable
upper tray into place.
3
24
5
2
4
1
2
3
4
5
6
7
8
9
11
12
13
14
16
Distributed by Mayborn USA Inc., PO Box 5003, Westport, CT 06881-5003
Copyright© Mayborn USA Inc. 2009
TOMMEE TIPPEE and CLOSER TO NATURE are registered trademarks.
Model 1069 120V~60Hz 650W
Made in China Leaflet # 0522200
www.tommeetippee.com
Remove the sterilized items. The teat tongs can be used to
remove the small items. The lid when removed and placed flat
becomes another hygienic work surface for making up feeds.
15
Place the lid onto the sterilizer base.
Plug in and switch on.
Press the start switch and it will light up amber. This shows that sterilizing
has begun.
The light will switch off when sterilizing has finished.
Allow to cool for 3 minutes before opening the sterilizer.
The contents will remain sterile for 24 hours if the sterilizer is unopened.
Wash your hands thoroughly before handling sterilized items. Take care as
the items will be hot.
Drain and rinse unit to prevent a build up of limescale.
PROBLEM SOLVING
CLEANING YOUR ELECTRIC STERILIZER
After each use, unplug and allow to cool before cleaning. Pour away any excess water and
wipe with a damp cloth only. Do not clean with abrasive cleaners or allow to come into
contact with solvents or harsh chemicals, damage could result.
DE-SCALING
De-scale your electric sterilizer every 4 weeks to ensure it continues to work efficiently.
To descale your electric sterilizer:
1. Empty the electric sterilizer and wipe down the inside with a sponge or damp cloth.
2. Pour in 1 cup of white vinegar.
3. Turn sterilizer on and run for 5 minutes.
4. Unplug the unit and let cool, then pour any remaining liquid down the sink. Rinse the
interior of the sterilizer well with cool water and use a clean sponge or damp cloth to
remove any buildup that came loose as a result of the descaling / cleaning process.
5. Plug unit back in and add regular amounts of water you use for normal warming. Turn
on and run for 5 minutes to remove any additional build up. Upon completion, rinse
sterilizer again and use as directed.
closer to natur
electric steam sterilizer
Descargue el manual en Español (PDF, 1.33 MB)
(Piense en el medioambiente y solo imprima este manual si es de verdad necesario)

Loading…

Puntuación

Dé su opinión de la Tommee Tippee 1069 Esterilizador calificando el producto. ¿Quiere compartir su experiencia con este producto o hacer una pregunta? Deje un comentario en la parte inferior de la página.
¿Estás satisfecho con elTommee Tippee 1069 Esterilizador?
No
Sea el primero en calificar este producto
0 votos

Únase a la conversación sobre este producto

Aquí puedes compartir lo que piensas sobre Tommee Tippee 1069 Esterilizador. Si tiene alguna pregunta, primero lea atentamente el manual. Puede solicitar un manual utilizando nuestro formulario de contacto.

Más sobre este manual

Entendemos que es bueno tener un manual en papel para tus Tommee Tippee 1069 Esterilizador. Siempre puedes descargar el manual desde nuestro sitio web e imprimirlo tú mismo. Si deseas tener un manual original te recomendamos contactar con Tommee Tippee. Es posible que puedan proporcionar un manual original. ¿Estás buscando el manual de tu Tommee Tippee 1069 Esterilizador en otro idioma? Elija su idioma preferido en nuestra página de inicio y busque el número de modelo para ver si lo tenemos disponible.

Especificaciones

Marca Tommee Tippee
Modelo 1069
Categoría Esterilizadores
Tipo de archivo PDF
Tamaño del archivo 1.33 MB

Todos los manuales para Tommee Tippee Esterilizadores
Más manuales de Esterilizadores

Preguntas frecuentes sobre Tommee Tippee 1069 Esterilizador

Nuestro equipo de atención al cliente busca información útil sobre los productos y responde a las preguntas frecuentes. Si encuentra inexactitudes en las preguntas frecuentes, indíquenoslo usando nuestro formulario de contacto.

Esterilizo el biberón todos los días, pero todavía contiene residuos de leche. ¿Por qué? Verificado

Siempre limpie el biberón antes de esterilizarlo. Un esterilizador mata las bacterias pero no es una alternativa al cepillo o al lavavajillas.

Ha sido de gran ayuda (92) Leer más

¿Con qué frecuencia debo descalcificar mi esterilizador? Verificado

Cuando el esterilizador se utiliza con regularidad, se debe descalcificar al menos una vez cada 4 semanas, dependiendo de la calidad del agua en su área específica.

Ha sido de gran ayuda (21) Leer más

El fondo de mi esterilizador se puso marrón, ¿qué debo hacer? Verificado

Probablemente se trate de una acumulación de sarro y una señal de que debes descalcificar el esterilizador. Consulta el manual de tu esterilizador específico para saber cómo descalcificar tu modelo.

Ha sido de gran ayuda (14) Leer más

¿Puedo secar manualmente un biberón después de la esterilización? Verificado

No, esto no es recomendable. El agua que queda en el biberón es estéril y no contiene bacterias. Al secar manualmente el biberón, se agregarán nuevas bacterias, lo que hará que el biberón ya no esté estéril.

Ha sido de gran ayuda (6) Leer más
Manual de uso Tommee Tippee 1069 Esterilizador

Productos relacionados

Categorias relacionadas